Thanks to the most wickedest (it's my word!) graphic designer I've seen: Ms Daijah Stylez, I now have a new logo! I'm in love with it, it brings together my personality nicely! You have to check her work out, she's sooo talented I'm in love with her work, from the cute characters, the girly colours, to the fonts!
Click here for her blog:
http://msstylez.blogspot.com/
or on the icon in the sidebar to the right --->
I really believe she's gonna be the next big thing, and feel so honoured to have my logo made by her *blush*
Thank you Ms Stylez =)
<3
New Logo!
Halloween look!
I thought I'd jump on the bandwagon with a Halloween look seeing as I can actually make myself look intentionally bad!
I did a vampy-zombie look, not overly so as I don't want to look totally gruesome... my inner princess says not to!
I used my new Sleek Bad Girl palette for this as I couldn't wait no longer to use it (I'll try swatching later).
Here's the stuff I used:
 > UD PP
> Sleek Bad Girl palette - "innocence" & "noir"
> MAC rapidblack penultimate eyeliner
> MO red kohl eyeliner
> Dior Show black mascara
> UD Surreal Skin concealer in "hallucination"
> myface.cosmetics concealer in "213"
> Illamasqua powder blusher in "hussy"
> Elf lipliner in "bitter"
> UD lipliner in "gash"
> Red Herring (Debenhams) red lipgloss
> Tesco fake blood
To start, I used the MO shading brush to put Sleek Innocence eyeshadow (shimmery white, top left corner of palette) on the whole lid. I then used MO blending brush for adding Noir to the rest of the eye (matte black, top left corner). I have to say this black eyeshadow was absolutely gorgeous, no fallout like the lighter Sleek colours and gave such pigmented colour!
I added the black all around the eyelid, from the crease to just under the brow, giving it a winged effect. I cleared the untidy bits with a cotton wool bud (with makeup remover), giving it a defined line of shadow as you can see below!
I then used the Models Own red kohl eyeliner for the bottom lashline & waterline, as intended when I first tried it in September! It was pretty good and can be doubled as a lipliner; you can also use a lipliner for a zombie look for the eyes, as long as it's soft!
I then used MAC rapidblack penultimate eyeliner for the top lashline, using Dior Show mascara after using the concealers under my eyes.


I only used a tiny bit of the blusher on my cheeks as I don't wanna look too healthy/alive, and I chose the Elf Bitter lipliner as it was more purple coloured (although it didn't end up looking as purple as I wanted! I also used UD Gash lipliner for the lips, filling the inner part of the lips with it, then topping the full lips with Red Herring (Debenhams own brand) red lipgloss & blotting the excess shine off.


I tried to do scary in the pic on the left but ended up like a little kid trying to be scary lol!
<3
I did a vampy-zombie look, not overly so as I don't want to look totally gruesome... my inner princess says not to!
I used my new Sleek Bad Girl palette for this as I couldn't wait no longer to use it (I'll try swatching later).
Here's the stuff I used:
 > UD PP
> Sleek Bad Girl palette - "innocence" & "noir"
> MAC rapidblack penultimate eyeliner
> MO red kohl eyeliner
> Dior Show black mascara
> UD Surreal Skin concealer in "hallucination"
> myface.cosmetics concealer in "213"
> Illamasqua powder blusher in "hussy"
> Elf lipliner in "bitter"
> UD lipliner in "gash"
> Red Herring (Debenhams) red lipgloss
> Tesco fake blood
To start, I used the MO shading brush to put Sleek Innocence eyeshadow (shimmery white, top left corner of palette) on the whole lid. I then used MO blending brush for adding Noir to the rest of the eye (matte black, top left corner). I have to say this black eyeshadow was absolutely gorgeous, no fallout like the lighter Sleek colours and gave such pigmented colour!
I added the black all around the eyelid, from the crease to just under the brow, giving it a winged effect. I cleared the untidy bits with a cotton wool bud (with makeup remover), giving it a defined line of shadow as you can see below!
I then used the Models Own red kohl eyeliner for the bottom lashline & waterline, as intended when I first tried it in September! It was pretty good and can be doubled as a lipliner; you can also use a lipliner for a zombie look for the eyes, as long as it's soft!
I then used MAC rapidblack penultimate eyeliner for the top lashline, using Dior Show mascara after using the concealers under my eyes.


I only used a tiny bit of the blusher on my cheeks as I don't wanna look too healthy/alive, and I chose the Elf Bitter lipliner as it was more purple coloured (although it didn't end up looking as purple as I wanted! I also used UD Gash lipliner for the lips, filling the inner part of the lips with it, then topping the full lips with Red Herring (Debenhams own brand) red lipgloss & blotting the excess shine off.

I tried to do scary in the pic on the left but ended up like a little kid trying to be scary lol!
<3
Saturday, 30 October 2010
Here's what I picked up today.. for a royal £12!


I'll be posting look on here as soon as, although I've been busy of late!
Can't wait to get my claws in these =D
<3
Friday, 29 October 2010
For the wedding weekend just gone, the bridesmaids wore a royal blue colour, so it was only fitting that blue eye makeup was required! The only problem was that I didn't have a blue on me (UD Radium would have gone, but it was at home)! I remembered seeing a lovely blue in MAC last time I was in Leicester & prayed it was there this time and it was!!

MAC Sea & Sky is a mineralize eyeshadow, half royal blue, half white with veins of green & purple in it on the white side. I love it a lot, maybe even more so than the VV She Who Dares eyeshadow!
I made this look a bit glittery by adding UD Spandex Heavy Metal glitter liner. Here's a complete list of products used:
 > UD primer potion
> MAC Sea & Sky eyeshadow
> Sleek inkpot
> UD 24/7 eyeliner in "zero"
> UD Heavy Metal glitter in "spandex"
> Dior Extase mascara (black)
> MAC select moisturecover in NC35
> Illamasqua powder blush in "hussy"
> Sleek pout polish in "pink cadillac"
To start, I used the white part of the eyeshadow (yes that tiny bit in the pot!) for the inner corners and on the brow bone. I then used the green veiny bit (at the top of the pot) for the middle of the eyelid. Lastly, I put the royal blue on the outer corner of the eyes and also on the lower lashline, followed by Sleek inkpot liner on the top line (with UD Zero on the bottom waterline). I then used UD Spandex glitter on top of the Sleek liner & finished the eyes with Dior Extase mascara.
For the cheeks I used Illamasqua Hussy blush on the apples of the cheeks & Sleek Pink Cadillac on the cheeks...


<3
Friday, 22 October 2010
I'm gonna be off to Leicester (again) & Birmingham, for my cousins wedding (part 2), so I don't think I'll be posting, but I'll try get some pics of my makeup/other people I do for when I get back (think lots of vibrant colours, I'm talking about greens, blues & pinks)!
Have a beautiful weekend people =)
<3
Have a beautiful weekend people =)
<3
Silver-Grey look
This look was inspired by the chick in the Roll Deep video for "Green Light": (Advanced warning, this video is very hot!) click here for the video. The only pics I could find off Google were these:


I tailored the look to my own taste; not so dark/black, I used more grey than black =)
Here's the products I used for this look:

> UDPP
> MO eyeshadow in "white pearl" & "silver grey"
> UD Alice in Wonderland palette- "vorpal" ("S&M")
> UD BOS II - "gunmetal" & "perversion"
> Barry M white eyeliner "30"
> UD eyeliner - "zero"
> Sleek ink pot
> eyelash curlers
> Dior Show mascara
> MAC select moisture cover NC35
> Illamasqua powder blush in "hussy"
> Sleek pout polish in "pink cadillac"
I started by applying Barry M white eyeliner to the inner corner of the eyes (after primer), so that the white bit would stay bright and pop, even after adding the darker colours. I put the MO White Pearl on top of this (the inner corner), followed by MO silver grey on the middle of the eyelid. I then added UD Vorpal (or S&M) on top of the Models Own silver, as it was too bright and Vorpal toned it down. I then added UD Gunmetal to the outer corner of the eye and a little bit of UD Perversion to darken it further. The outer corner was winged using the MO blending brush, and the made into a more punctuated "wing" by using a cotton bud soaked in makeup remover to shape it.
UD Zero was used as top liner, whilst the bottom lash line was shaded using the remainder of what was left on the MO blending brush. After MAC concealer was used under the eye (and mixed a little with face moisturiser cos I'm still ill!), I added mascara to top and bottom lashes.


For the rest of the face I used Illamasqua blush on the apples of the cheeks to give a bit of colour compared to the cold/grey eyes. For the lips I decided to use pink (Sleek Pink Cadillac) as I personally like pink & grey together!


<3
Thursday, 21 October 2010
Even though I've been ill the last couple days, I've still managed to play with makeup (much to my husbands surprise!) It was just a false lashes tryout really (Harare by Sleek), with a bit of eyeliner and red lips.
Here's a list of products used:
 > Sleek ink pot
> Sleek "Harare" eyelashes
> Dior Show black mascara (not in pic)
> MAC select moisturecover concealer in NC35
> Clinique blush in "sunset glow"
> UD lip liner in "gash"
> Vaseline!
I used the ink pot on the top eyelids, then applied the eyelashes, going over the lashes with the inkpot again. I then finished the eyes with under eye concealer and mascara to bond my lashes with the false ones as much as poss (although it didn't quite work!).
For the lips, I used UD lip liner Gash all over the lips, with Vaseline on top. For the cheeks Clinique Sunset Glow was used, a subtle blush to compliment the red lips.
Et Voila!


A simple but effective used by many celebrities, dunno if it worked for me though, cos my eyes are all red from being ill & streaming lol!
<3
Here's a list of products used:

> Sleek "Harare" eyelashes
> Dior Show black mascara (not in pic)
> MAC select moisturecover concealer in NC35
> Clinique blush in "sunset glow"
> UD lip liner in "gash"
> Vaseline!
I used the ink pot on the top eyelids, then applied the eyelashes, going over the lashes with the inkpot again. I then finished the eyes with under eye concealer and mascara to bond my lashes with the false ones as much as poss (although it didn't quite work!).
For the lips, I used UD lip liner Gash all over the lips, with Vaseline on top. For the cheeks Clinique Sunset Glow was used, a subtle blush to compliment the red lips.
Et Voila!


A simple but effective used by many celebrities, dunno if it worked for me though, cos my eyes are all red from being ill & streaming lol!
<3
Tuesday, 19 October 2010
First of all thanks to all who entered, I was really excited seeing as its my first blog giveaway =D
The winner was decided via random.org after I counted the extra entries from five of you. And the winner issss *drumroll* :
Congratulations, you came as a surprise on the last minute, but your three entries got you lucky at random.org! I'll be emailing you for your details =)
As for the others who entered sorry you weren't lucky this time round, but I'll defo be doing another giveaway soon, and should be better, or I may even give my own Barry M nail polish if I have no use for it.
<3
The winner was decided via random.org after I counted the extra entries from five of you. And the winner issss *drumroll* :
Keisha Kennedy (All That Sparkles)
Congratulations, you came as a surprise on the last minute, but your three entries got you lucky at random.org! I'll be emailing you for your details =)
As for the others who entered sorry you weren't lucky this time round, but I'll defo be doing another giveaway soon, and should be better, or I may even give my own Barry M nail polish if I have no use for it.
<3
Barry M competition ends tonight!!
Tonight I will pick a winner for the Barry M competition, so any last entries can still be entered up till midnight (London time). I tried out my polish again, this time over budget Debenhams own brand polishes:
 and here's how they looked:


For the thumb I used the lighter Red Herring pink nail polish (out of the packet). For the index finger I used the darker pink, the middle I used the red polish from the pack. Ring finger in picture one is the purple polish (gold for second pic) & finally the turquoise on the pinky =)
In the second picture I added another coat of Barry M to the middle finger as it was a little too thin on one side in the first pic. Don't do this! You don't get the same broken effect, it's not as widely cracked as just one coat.
Anyway, hope this helps with the winner of the polish tonight, good luck to all of you! =)
<3
 and here's how they looked:

For the thumb I used the lighter Red Herring pink nail polish (out of the packet). For the index finger I used the darker pink, the middle I used the red polish from the pack. Ring finger in picture one is the purple polish (gold for second pic) & finally the turquoise on the pinky =)
In the second picture I added another coat of Barry M to the middle finger as it was a little too thin on one side in the first pic. Don't do this! You don't get the same broken effect, it's not as widely cracked as just one coat.
Anyway, hope this helps with the winner of the polish tonight, good luck to all of you! =)
<3
Monday, 18 October 2010
I bought the Sleek Ink Pot and it's apparently a dupe for MAC fluidline (check the dupe list post before). Thing is, I've not actually bought MAC fluidline before, only swatched it on my hand in store and wasn't too impressed by it so I didn't buy. But seeing as many people use cream/gel eyeliner and swear by it, I thought I'd give it a go.
The Sleek "ink pot" gel liner comes in a frosted pot with a dinky little liner brush and is "waterproof & long-lasting". I tested this statement in the bath and I must say: it IS waterproof & long lasting (and this was after a few facial washes)!
I tried the gel liner with the included brush & my Models Own (angled) liner brush:

When swatched on my hand below, the Sleek mini liner brush didn't seem as good in giving colour towards the end of the line as my MO brush. But I later tried it on my eye and in actual fact the Sleek brush was better in colour and more precise. Here's the swatches on my hand:

The top line is done with the Sleek brush & the bottom with the MO brush which came out thinner on my hand that on the eye.
Verdict: It's a cute little eyeliner pot and for a first timer of gel liners, it's pretty easy to use and looks lovely. I'd recommend it as a cheaper option, whether it's like the MAC fluidline, I do not know as I can't compare!
<3
Sunday, 17 October 2010
Here's something I came across the other day, something all us beauty bloggers could do with/ test for ourselves; the dupe list. Temptalia have a spreadsheet of all supposed dupes & it can be added to!
Obviously, for beauty addicts it's a good list to check for cheaper options of more expensive brands.. or vice versa!
Here it is: http://www.temptalia.com/makeup-dupe-list
Apparently there are dupes for my favourite eyeshadow (UD "fishnet"): MAC "stars n rockets", Ben Nye "Cosmic violet", Milani "shock". Hmmm... might give some a try ;)
<3
Sleek Tropical Look
Seeing as winter is definitely coming in London, I decided to brighten my mood last week by doing a glowing tropical look (using my two new Sleek purchases!)


For this look I used:


> Elf mineral primer
> "original" Sleek palette - the light gold for the inner corner and blues & greens
> UD "zero" eyeliner
> MAC penultimate rapidblack eyeliner
> Dior Extase mascara (black)
> myface.cosmetics concealer in "213"
> Sleek "rose gold" shimmer blush
> Sleek Pout Polish in "electro peach"
To start, I applied the light gold colour (bottom left corner of the palette) to the inner corner of the eye(s) and brow bone, followed by the green colour (top right corner) to the middle of the eyelid & then blue to the outer corner. I then used the MO blending brush to use the teal/dark turquoise colour of the palette to the crease, blending upwards to the light gold brow bone, then blending between the blue and green edges, so they gradually fade into eachother.
The top eye was lined with UD Zero, then MAC rapidblack penultimate liner on top for a darker line. The bottom lash line was lined first with blue from the palette with a wet brush (on the outer corner), then again with green from the palette on the middle of the lash line to the inner corner (to meet the light gold). UD Zero was used on the lower waterline.


To finish the eye, I used Dior Extase mascara after applying myface.cosmetics concealer under the eye. For the cheeks I used the Sleek Rose Gold shimmer blush (which I am totally in love with for a peachy glow btw!), and for the lips I used Sleek Electro Peach pout polish..


Let me know what you think!


<3
Saturday, 16 October 2010
I've been watching my blog the last couple days and I've hit 55 followers tonight! As aforementioned, for my first giveaway I'll be giving the newest nail sensation: Barry M Instant Nail Effects:

I bought two and seeing as I'm not completely crazy about it, I thought I'd give the other one away.
To win, post a comment about which Barry M product is your favourite & why, leaving your email address.
Extra entries:
> 2 entries: Tweet or join my facebook page: frootibeauty on facebook (don't forget to post a link to your tweet/your facebook name)
> 3 entries: post about this giveaway on your blog, leaving the link in your comment too!
Competition rules:
> You must be a follower of my blog
> You must be a follower of my blog
> One comment/entry per person
> No anonymous posts
> Email addresses are needed
> Closing date: Tuesday 19th October 2010.
> Open worldwide.
This giveaway is open internationally. It is your responsibility to know your customs laws to make sure that you receive the product. Once the items leave my hands, I am no longer responsible.
Good Luck!
<3
Wednesday, 13 October 2010
Popped into Superdrug the other day & bought one of the new hyped shimmer blushes. I tried them all on my hand but Pomegranate & Sunrise seemed too dark, so I bought Rose Gold.. and I loved the fact it was two toned (like my fishnet) =D
I also bought Electro Peach pout polish seeing as I am a huge fan of them.
Here's how they look:

<3
I also bought Electro Peach pout polish seeing as I am a huge fan of them.
Here's how they look:

I'll be posting a look with these very soon ;)
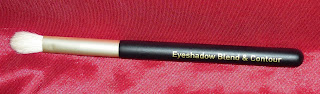
I also bought a supposed MAC 217 brush dupe: No7 eyeshadow blend & contour. Seeing as I had the £5 No7/Ruby & Millie voucher, I got this brush for £1.50.. bargain!

I've used it once since buying and its lovely and fluffy, although I think its a tad too big for my eyes :|
Newho, keep a lookout for the next look.. gonna do something with the original Sleek palette!
MAC Venomous Villains look
Here's a look I did with the "she who dares" eyeshadow & "toxic tale" lipstick... I know they don't really match but I figured I'd do a makeup look with my collection (barring the cruella lipglass seeing as I don't intend on keeping it!), so here's a very simple look.
Products used:

> UD PP (keep forgetting to add to the picture!)
Products used:

> UD PP (keep forgetting to add to the picture!)
> MAC VV "she who dares" eyeshadow
> UD "zero" eyeliner
> Maybelline black line definer
> UD "zero" eyeliner
> Maybelline black line definer
> Dior Show black mascara
> MAC select moisturecover NC35 (forgot aswell!)
> Illamasqua "hussy" powder blush
> MAC VV "toxic tale" lipstick
> Lipcote (lipstick sealer)
> MAC select moisturecover NC35 (forgot aswell!)
> Illamasqua "hussy" powder blush
> MAC VV "toxic tale" lipstick
> Lipcote (lipstick sealer)
I put the green part of She Who Dares all over the eyelid & bottom lashline, with the MO shading brush. I then added some of the blue part to the end of the eyelid, forming a wing with the MO blending brush, and blending some of the blue into the crease. I then lined the top lid with Maybelline eye definer and the bottom waterline with UD Zero eyeliner. After applying under-eye concealer, I added two coats of Dior Show to the lashes, top & bottom.

For the rest of the face I used Illamasqua "hussy" blush on the apples of the cheeks and I was going to do red lips to finish the wicked witch/halloween green eyes look, but as I said before, I thought I'd use my VV lipstick. I then sealed the lipstick to finish the look!


<3

For the rest of the face I used Illamasqua "hussy" blush on the apples of the cheeks and I was going to do red lips to finish the wicked witch/halloween green eyes look, but as I said before, I thought I'd use my VV lipstick. I then sealed the lipstick to finish the look!


<3
Tuesday, 12 October 2010
I'm not really a nail polish person, barely wear it, even though I have quite a few colours. One polish that excited me earlier this year (and two weeks ago) was the lovely brand: Del Sol. Now it's not readily available in the UK, but it was on the exclusive website () back in June this year, so I was intrigued & bought one: Ruby Slipper. It's a glittery silver clear polish, that changes to red in the sun. I had lots of fun in Summer shoving my hands in and out the car window and my fascination still hasn't died down. Except that there's barely been any full on sunny days lately in London, so that's a dampener.
Then, two weeks ago whilst walking past my favourite glittery stand in Selfridges (Jinny Rainbow), I spotted them and it was quite a selection! I decided to go for a clear nailpolish (Peek-A-Boo), which changes to a pinky-red in the sun.

Since there was a bit of sun in London today, I quickly donned the nailpolishes to see the colour change, but it only changed a little (as expected) cos I wasn't even in direct sunlight (I just stuck my hand out the window).
Here's a before (Peek-A-Boo & Ruby Slipper alternated):

And the after(sun):

In direct sunlight it goes darker still and I love how it fades when your indoors!
Another NOTD look is from the infamous Barry M instant nail effects. Either I don't know how to put it on, or it just doesn't go with the Marvala nail polish I used underneath, but I just am not impressed by it. It's looked great on some of the posts I've seen, but I wasn't too phased by it when I did start seeing it. The only thing that made me buy it was the fact that many people were blogging that it was out of stock where they shopped. This was the case at Superdrug, however Boots had 3 in stock so I bought two of them (just in case I liked it). But I don't! I might hold on to the one I used, but I'm thinking of giving it away to my cousin who's a nail fanatic.. the other one I may aswell give away!
When I get to 55 followers I'm gonna have the giveaway, just dunno how yet!
Here's how it looked on top of Mavala "berlin":


If anyone knows where I'm going wrong with this application, please do tell!!
Makeup storage
Ok, most of us beautyholics have meeelions of makeup, most of mine have been stashed in drawers, near the mirror, in bed storage, on the dresser, you name it I'll store it there (just ask my disgruntled hubby)!
So it was a godsend when my aunt's belated wedding pressie came last week: "monaco" from beauty-boxes.com, a large trolley, with lots of compartments!


So it was a godsend when my aunt's belated wedding pressie came last week: "monaco" from beauty-boxes.com, a large trolley, with lots of compartments!

Above is the full trolley, with a seperate lid for when the top bit is detached:

I actually use this top bit for my everyday makeup, as well as storing my 4 book of shadows AND 2 Ed Hardy palettes, along with my everyday single eyeshadows, mascaras, liners, etc.
Here's how it looks with the everyday box on top:

And with my stuff in! (longways):

I've seen blog posts on other makeup storage, but I'm happy with mine for now (although there's still some spare makeup in my bed & a drawer or two) ;)
<3
Subscribe to:
Posts (Atom)


