Showing posts with label blue eyeshadow. Show all posts

FFF: UDxGwen "Danger in 1987" Blue-Gold Makeup Look

Friday, 8 January 2016

Hello my loves,

Thought I'd start 2016 with a fresh, colourful FFF/makeup look featuring the same main two shadows as the last look (1987 and Danger), but used in a different and more colourful way (as requested).

I also followed the Dress Your Face contouring technique with the LA Girl concealers I already owned (Creamy Beige & Fawn).. Hope you like it as much as I did creating it <3

FFF: Blue and Purple makeup look

Friday, 13 December 2013

This weeks FFF is inspired by a client's dress that she will be wearing for her engagement/wedding in December.

I wanted to also update my Blue-Purple look from 2012, but for this look I used the newly acquired Kiko Evolution Must Have Palette (reviewed here) and as many drugstore/affordable products too, so here goes!

Products used:
Eyes: 
> UDPP - Eden

> NYX JEP in Black Bean
> Kiko Evolution Must Have Palette - 7 shadows - 1 (beige sparkle), 2 (pinky nude matte), 6 (bright pink), 7 (lilac matte), 8 (indigo shimmer), 9 (cream shimmer), 12 (dark blue shimmer)

> Urban Decay Smoked Palette - Freestyle and Blackout
> Kiko Double Glam Eye Liner - 100 Light Gold (& Ebony) 
> Inglot AMC eyeliner gel - 77 (black)
> Kiko Unforgettable Waterproof mascara (black)
> Ardell Professional 120 Demi lashes
> Anastasia Beverly Hills Brow Wiz and Brow Powder Duo - Ebony
> Urban Decay 24/7 concealer - ATF
Face: 
> UD concealer in ATF
> Graftobian HD creme foundation Warm Palette - Buttermilk & Mid. Marigold for contouring
> EX1 Invisiwear foundation - F200
> UD Razorsharp powder
> Sleek Contour Kit - Medium
> Kiko Essential Bronzer in 201 Sienna Melange
Lips:
> Sabaya lip pencil in 08 (pink, from Dubai)
> UD Revolution lipstick in Fiend

I started by priming the eye with Eden PP and then just on the eyelid went over with NYX JEP in Black Bean, blending upwards slightly.
I patted on the Dark Blue shimmery eyeshadow from the Kiko palette with a flat brush all over the eyelid on top of the NYX JEP.
I then highlighted the brow bone with the Cream shimmer colour and the inner corner of the eye with the beige sparkle. The matte pinky nude colour was then used under the brow bone highlight, followed by the matte lilac shadow closer to the crease and UD Blackout in the crease. The slightest hint of the bright pink shadow was used above the crease followed by UD Freestyle eyeshadow in between the colours to blend out any harsh lines.
I lined the top of the eyelid with Inglot AMC gel liner in black and followed the outer bottom lashline with an angled brush creating a slight outward flick for the bottom inner corner. I then lined the inner eye with Kiko's Double Glam Eye Liner but only using the Light Gold shade and following the outer flick on the inner bottom corner.
I went back with a wet finger and added a tiny bit of the indigo shimmer to the middle of the lids to make the colour pop even further and with a wet liner brush went underneath the eye with the same dark blue and indigo shadows, following the outer eye only.
To finish off the eye I used the Anastasia Beverly Hills Brow Wizin Ebony and filled in the inner brow with the lighter shade of the Brow Powder Duo. 
I added the Ardell 120 Demi lashes after I finished my face and Voila!
For the rest of the face I decided to do a toned down version of that Kim K/"bridal" contouring and used both the UD 24/7 concealer pencil and Graftobian Creme foundations to do this.
Be warned, the picture below is scary looking haha
I then used a beauty blender sponge to add the EX1 Invisiwear liquid foundation in F200 all over the face, using a small concealer/foundation brush to get in the nooks and crannies around the eyes and to clean around the eyebrows.
I didn't really need to set the foundation as it dries to a semi matte finish, but dabbed a bit of UD Razorsharp powder on my T-zone anyway as shine shows with flash.
I then added powder contour with the Sleek Contour Kit in Medium using my beloved Illamasqua Blush Up Brush, highlighting the top of the cheekbones too. Kiko Essential Bronzer in Sienna Melange was also used in between the contour and highlight to give depth.
For the lips, I used Sabaya lip pencil (from Dubai) with UD Revolution Lipstick in Fiend, accessorising with a navy scarf of course and the tikka from my own wedding:

And there you have it..
I have to say I'm even more impressed with the Kiko Palette I used for this look, the colour payoff is amazing and I'm particularly loving the sparklier shades as they can be used wet to make the sparkle stand out even more. I can now say that I'd give the palette 5 lipsticks out of 5!
I hope you enjoyed this look as much as I did creating it, I have to say I love this combination of blue and purple and certainly did when I did the older version in 2012!

Would you wear this look?


FFF: Electric Blue makeup look

Friday, 12 July 2013

Hi guys!
First of all I want to apologise massively for the lack of posts, I've been feeling uber guilty about it, but I've been so busy it's just been impossible to blog.
But I am back. I have some more free time over the next few weeks so I shall be catching up with reviews and makeup looks amongst other posts so feel free to email or tweet me your requests!

This week the FFF is back (FOTD Frooti Fridays), it's one I did before my holiday to Malaysia in May but has taken forever to upload as I wanted to upload it with the video tutorial.. Hope you enjoy it!

Eyes: 
> UDPP

> NYX JEP in Milk
> UD 15 year anniversary palette - Evidence, Deep End, Junkshow, Blackout 
> UD Deluxe Shadow Box - Peace
> La Femme "Bisque" eyeshadow (matte)
> UD 24/7 eye pencils - Electric, Flipside, Deviant
> Maybelline Falsies Black Drama mascara
> Khuraira ACC in Light   
> UD 24/7 concealer in ATF
> Inglot AMC eyeliner gel - 77 (black)
Face: 
> Makeup Forever HD foundation in N153
> Urban Decay Toasted Bronzer
> Benefit Bella Bamba blush
> MUA Undress Your Skin highlighter
> Ben Nye Banana Powder
Lips:
> UD SSLC in Lovechild

After priming the eyes with UDPP & NYX JEP, I marked out the crease with the RT Detailer/Multi tasker brush and Blackout eyeshadow, creating a tiny flick at the ends and filling it slightly with the shadow.
Using a rounded blender brush, I used Evidence in the triangle filled area and blended inwards slightly; I then blended upwards and inwards with a longer haired blending brush.
Add more Evidence with the fluffy blending blush if needed.
With a flatter eyeshadow brush add Peace eyeshadow (Deluxe Shadow box) to the inner corner of the eyes. Then add Deep End (Anniversary Palette) to the rest of the eyelid with a flat shadow brush.
Next add La Femme eyeshadow in Bisque to the brow bone and blend inwards to the inner corner of the eye. With a long haired fluffy blending brush, add Junkshow (Anniversary palette) just above the navy blue Evidence. With a tapered blending brush, add Blackout (Anniversary palette) in the crease and blend upwards and inwards. Go back in with Bisque on the browbone if needed.
Clean up under the eye and on the outer corner, pulling upwards. With the UD Electric 24/7 pencil, line the inner bottom lashline, a third of the way in, then the middle part with Flipside pencil and lastly with Deviant pencil on the outer bottom lashline. Blend slightly with a multitasker brush.
Perversion eye pencil was used on the inner waterline and Inglot AMC gel eyeliner in black (77) was used to create the extended top liner and bottom wing from the bottom lash line.
Using the same angled liner brush, use the remains of the gel eyeliner to carve the bottom and top eyebrow lines and fill in with the remaining colour or brow powder/matte eyeshadow if needed.

Make sure the under eye area is cleaned before applying concealer; I used Khuraira ACC in Light and finish off the eyes by curling the lashes and applying Maybelline Falsies Black Drama mascara:
For the rest of the face I striped the Urban Decay concealer in ATF where needed and blended with a flat foundation brush, then applied Makeup Forever HD foundation in N153 and blended with a damp beauty blender sponge. I set the under eye concealer with a little Ben Nye Banana powder and applied the Urban Decay Toasted bronzer in the hollows of the cheeks with the RT contour brush. I then added MUA Undress Your Skin highlighter on the top of the cheeks and Benefit Bella Bamba blush on the apples of the cheeks.
Finally for the lips I used UD SSLC in Lovechild:
I then thought I'd try it with a brighter lip and wanted to try my newest purchase - Illamasqua lipstick in Eurydice; here's the two side by side:
Below is the video tutorial, so if you would like to follow step by step, please feel free to show me how yours looked!

Which lip do you prefer with this look? Would you wear this look out?

Tuesday Takeover: MakeupAtoZ

Tuesday, 2 April 2013

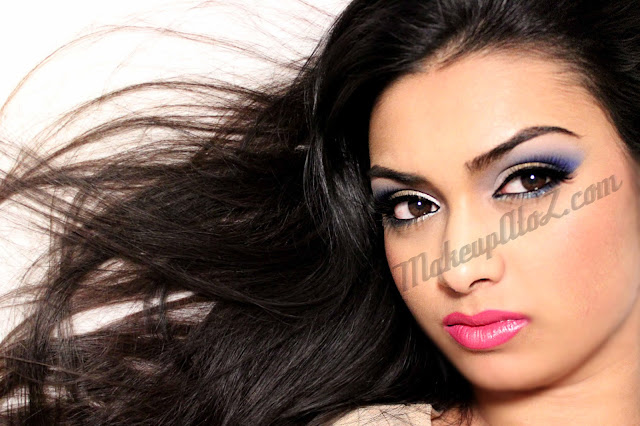
This second instalment of Tuesday Takeover will be by Tanzina of Makeup A to Z (or atoz lol).
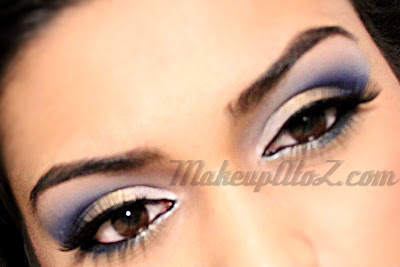
I recently have been teaching her my makeup techniques and we decided to do this look I had done on a previous client:
I went through what was used and where and she followed my instructions and copied the look perfectly!
So without further ado, here's her post:

Hi lovelies! 
Quick introduction, my name is Tanzina and I write over at Makeup A to Z, (that’s Makeup Ai Too Zed and not ahtoz like Safiyah first thought it was!) I’m a beauty blogger which a penchant for all things beauty related but I haven’t really been brave enough to do makeup looks over at my blog. I’ve always played around with makeup, created some hits and some huge misses when playing around and recently Safiyah has taken me under her wings and made me her little pet project. She’s been brushing up my makeup skills, and I’ve earned the title of Frootibeauty’s very first apprentice! 

In one of our makeup workshops/ slash /my shisha fixes/ slash /girly chat dates, I managed to create a look inspired by our very own Frooti/s clients and I thought as part of the second Tuesday Take Over, I would attempt my very first makeup look posts! I hope you enjoy the post, and I’m able to do half as good as Safiyah when it comes to explaining!
Products Used:

Eyes:
>UDPP
>NYX Jumbo Pencil: Milk
>Models Own White Pearl Pigment
>La Femme E/Shadow: Gold Leaf
>Urban Decay Deluxe Shadow Palette: Adore
>Urban Decay Smoked Palette: Freestyle
>Urban Decay Pencil Liners: Dime & Deviant & Perversion
>Urban Decay Liquid Liner: Perversion
>MAC Eyeshadow: Carbon
>False Lashes: Let’s Go Lashes (number unsure)
>Japonesque Brow Palette

Face:
>Urban Decay Concealer Pencil: ATF
>Estee Lauder Invisible Fluid Foundation: 4WN1
>Ben Nye Banana Powder
>Sleek Medium Face Form
>Urban Decay Flushed palette

Lips:
>MAC Lip Pencil: Embrace Me
>MAC Lipstick: Girl About Town
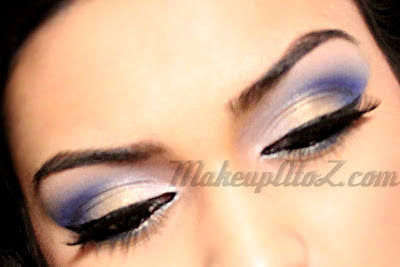
I arrived at Safiyah’s place with my brows already done using the Japonesque Brow Kit, I’m okay with going out the house without makeup but I find just going the extra step and making the brows tidy really makes a huge difference. To create the look, I applied UDPP and NYX Milk Jumbo Pencil to create the base. I applied La Femme Gold Leaf all over the eye lid up to the crease. This is such a unique olive gold colour, it’s gorgeous. I then applied Model’s Own Pearl pigment in the inner corner of my eyes to highlight it. I applied UD Adore to the crease and blended upwards and also bought it out like a V shape on the outer corners (Saf is so much better at explaining blending techniques, I’m not going to even try!). Later on I went and added a tiny bit of MAC Carbon which is a matte black to the crease just to add a little bit more definition to the socket line. I blended the blue out with UD Freestyle and also used that to highlight my brow bone. I added more Models Own Pearl to the inner corner and UD Pencil in Dime to the bottom lash line, still focusing in the corner. I added UD Pencil in Deviant, a pop of blue, to the outer half of the bottom lash line and set it with UD Adore shadow. I then lined the waterline with UD pencil in Perversion and liquid lined the eyes in liquid Perversion. After using mascara I popped on some lashes, and that’s the eyes done!

For face, the first thing I started with was the UD Concealer Pencil in ATF, and cleaned up under the eyes and helped make the outer shadow line more straight and tidy. I then applied it under my eyes because unfortunately nothing I do seems to help get rid of these stupid dark circles. I then applied my base, the Estee Lauder foundation, and set it all with Ben Nye Banana Powder. I contoured my cheek with the Sleek Face Form and also highlighted using the same palette. For blush, I used the UD Flushed palette which has a really pretty pink shade in it!
For lips, it’s a super easy recipe. I lined my lips using MAC Pencil in Embrace Me, which is a gorgeous shocking pink lip liner. I think its limited edition but fingers crossed it still should be in stores as I only bought it last month. I then applied my favourite pink, MAC Girl About Town. And we are done with the look!

I know my pictures aren’t as helpful, I don’t really have as many eye close up as Safiyah but I’m learning! Hopefully next time round they’ll be better, this time I had a few problems with focusing and only realised until I had taken all my makeup off. Sucks! 

I hope you enjoyed reading today’s post and the takeover was successful. If you haven’t had a look at my blog before I would love it if you have peek and I’m also over on Bloglovin (link) Facebook (link) twitter (link) and all that good stuff. I leave you with a super cheesy picture of me smiling, believe me when I say I saved you from seeing the worst! Saf knows what I’m talking about. 

Take care lovelies :) Tanzina x


Lol I do know what you're talking about Tanzina, and it's really not that bad haha ;)

Hope you enjoyed Tanzina's post, please feel free to email me if you'd like to do any Tuesday Takeover posts yourselves, I'd like to keep this feature regular!


FFF: Blue Smokey look

Friday, 30 November 2012

Hey guys!
I know it's been a while but I've finally had some time to sit down and do a makeup tutorial before I go on holiday on the 8th of December; and not only that I filmed it too *gasp*
I thought I'd try it out but in all honesty it seems sooo long to: get the stuff together in one place, get decent lighting, film it properly (and talk coherently), edit it, then save it, then upload it to YouTube... Hats off to you YouTube tutorial bloggers, I seriously don't know how you do it! 

Anyway, I chose to do this look as the Urban Decay Vice Palette was recently released and a few people were asking me how I'd use the bright blue colour (Chaos). So I thought I'd do a blue smokey look with this colour and see how it goes.. hope you like!


Products used:
Eyes:
> UDPP
> NYX JEP in Milk
> UD Vice Palette: Chaos, Laced, Provocateur
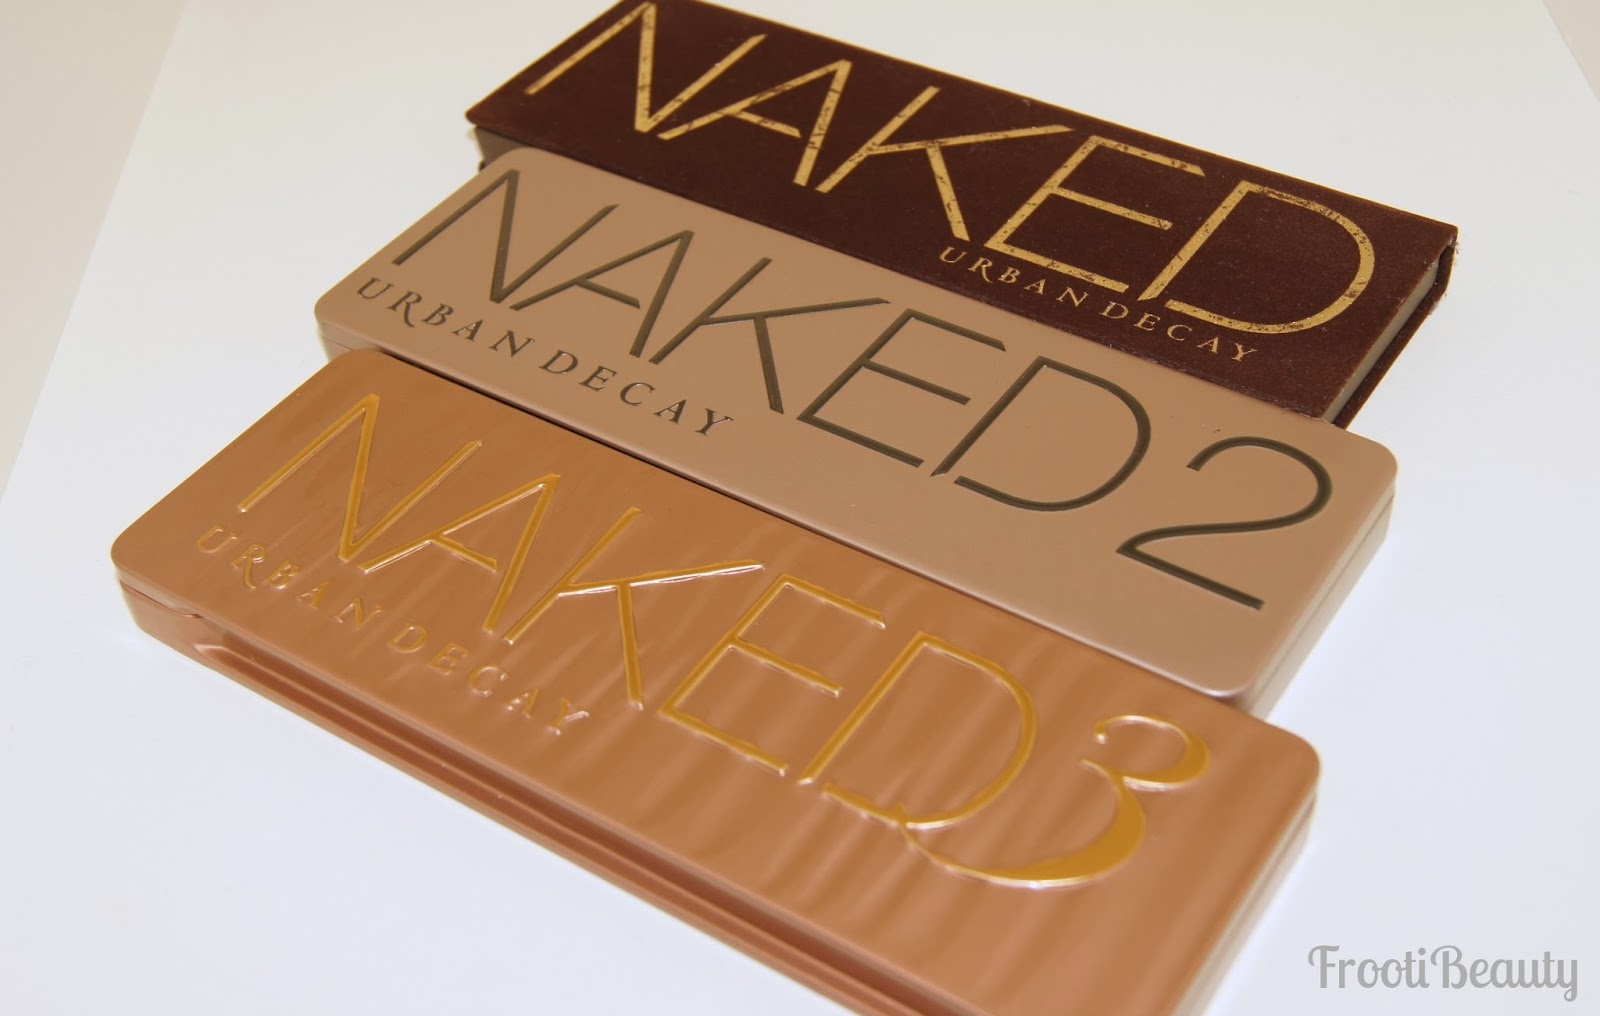
> UD Naked Palette: Naked
> UD single eyeshadow: Goddess
> NYC black liquid liner 
> UD 24/7 eyeliner pencils in Perversion & LSD
> UD Heavy Metal glitter liner in Spandex
> MAC Splashproof mascara
> Daniel Sandler Jumbo Jet mascara
> Khuraira ACC in Light
Face:
> UD Surreal Skin Cream to Powder foundation - Supernova
> UD Razorsharp powder
> UD Toasted Bronzer
> Kiko Warm Tangerine Glow blush palette
> Elf cream liner in black (eyebrows)  
Lips:
> Sabaya lip pencil in 08 (pink) [from Dubai]
> MAC lipstick in Watch Me Simmer

After priming the eye with UDPP & NYX JEP in Milk I applied Chaos to the eyelid, followed by Goddess in the outer corner/crease, blending upwards slightly and into the inner corner of the eye. Naked was used just slightly above this, followed by Laced on the inner corner, but above Chaos. I used Provocateur on the brow bone, blending down into Naked and also used on the inner corner of the eye.
UD 24/7 Perversion eye pencil was used to line the inner eye, whilst NYC liquid liner was used for the top liner. LSD was used on the lower lashline too, connecting with the black liquid liner. To finish off the eye I used MAC Splashproof mascara and Daniel Sandler mascara for more dramatic lashes, then UD Heavy Metal eyeliner in Spandex underneath the liquid liner flick on the outer corner.
I filled in the brows with Elf cream liner in black (lightly!) and concealed under the eyes to finish:
I used UD Cream to Powder foundation in Supernova, then the Razorsharp powder and Toasted bronzer in the hollows of the cheeks; I then used a warm coral/tangerine colour on the cheeks and a highlighter from the Kiko Warm Tangerine glow palette. On the lips I used Sabaya lip pencil in 08 and MAC Watch Me Simmer lipstick:
And there you have it! 

I've also done a video tutorial on this makeup look (eek!!), it's my first video so there's a lot of umm-ing and ahh-ing and I'm totally not used to being and seeing myself on camera so I don't know if it's good enough! The lighting is awful coz it's just grey these days and there's barely any time to do tutorials in daylight hours; I did try to make it as short as possible too, hope you like it and find it easy to follow anyway!


What's your favourite colour from the Vice palette? Would you wear this look?


Avon Arctic Goddess event & quick review

Saturday, 13 October 2012

I recently attended the Avon Arctic Goddess launch which introduced 9 new products to their already substantial cosmetics range; the Arctic Goddess collections includes two new palettes, three lipglosses & nail varnishes and a mascara.

I've haven't properly tried Avon products lately; I tried a few products here and there when I was a teen and reacted to a Color Trend eye pencil - not good!

Fast forward a couple years and here I was eager to see how things have changed. Luckily it wasn't just the Arctic Goddess products being shown at the event, so I got to peek at the other permanent ranges like the foundations and lipsticks.
One of the palettes that caught my eye - gorgeous colours!
I decided to get my nails done by Marian Newman and chose the Arctic Goddess colours Sea Breeze and Green Goddess on top as the greens went with my outfit.
Getting my nails done by celebrity manicurist Marian Newman
Sea Breeze underneath Green Goddess
Sam & Nic of Pixiwoo were there to give lovely makeup advice as well as just a general friendly chitchat. We talked about the new Avon collection and how best it can be used as well as YouTube and names like Pixiwoo and Frootibeauty!
I went with Numera, Tanzina and Asmaa and we managed to get a sneaky pic in before meeting Alesha Dixon, Avon's Beauty and Empowerment Ambassador:
Alesha was absolutely gorgeous and friendly, explaining why she became the ambassador and how she supports domestic violence initiatives. She modelled the new Arctic Goddess blue palette (which I got to take home) and gushed about how she loves the Ideal Flawless foundation and perfectly nude nail varnish too; personally I think her natural skin is flawless, as a makeup artist I know a good base helps a makeup look look amazing, so that's her real secret!

I didn't get to take a proper FOTD picture but I have one pic that you can sort of see what I wore:
excuse the funny face!
The new collection is all very Snow Queen and icy but also slightly Mermaid-like too with the green nail polishes and second eyeshadow quad.
I got to take a few goodies from the new collection home:
I found the blue quad's matte colours to be more pigmented than the shimmery ones:
The Ultra Colour Rich lipgloss in Pink Icicle was surprisingly unsticky which I loved. The pink shimmer is sheer but the multicoloured glitter was pretty enough for me anyway. I also liked the thin applicator for precise application:
Finally, one of my favourite nail polishes from the range, Arctic Waters:
I do think my opinions of the company have changed as the quality seems to be a lot better than what I knew of it; I'm also quite impressed with the Supershock Gel Liner that I got to try out at the event and take home so looking forward to see if it lives up to the hype!

The Arctic Goddess collection launches in November and can be bought from an Avon rep (if you have one near you!) or online at www.avonshop.co.uk.

Have you tried Avon products before? What are your thoughts/favourite products?


FFF: Blue-Purple makeup look

Friday, 20 April 2012

This weeks FFF was inspired by forgotten products laying in my makeup draw that I hadn't used in a while with the exception of the lip products. 

Products used:
Eyes:
> UDPP
> NYX JEP in Milk
> MAC Sea & Sky Mineralize Eyeshadow (LE)
> Sleek Monaco palette - Bamboo, Midnight Garden, Sand Walker, Kiwi Zest, Moors Treasure.
> Sleek Au Naturel palette - Bark & Noir
> UD 24/7 eye pencil in Zero
> MAC fluidline in Blacktrack
> Ardell 110 demi black lashes
> Khuraira ACC in Light
> MAC Studio Finish concealer - NC35
Face:
> Bourjois Healthy Mix foundation in 55
> Illamasqua Hussy Blush
Lips:
> NYX Jumbo Lip Pencil in Chaos
> UD SSLC in Lovechild

After priming the eye with UDPP & NYX JEP in Milk I applied the blue part of the MAC Sea & Sky to the eyelid, followed by Sleek Midnight Garden in the outer corner/crease, blending upwards. Moors Treasure was used just slightly above this blended Midnight Garden followed by Bamboo on the brow bone, blending down into Moors Treasure & Midnight Garden.
UD 24/7 Zero eye pencil was used to line the inner eye, whilst MAC Fluidline was used on the top liner and creating another parallel stroke from the bottom lash line. Using a liner brush, Midnight Garden & Kiwi Zest were added to the lower lashline too, connecting with the black fluidline.
I used Ardell 110 demi black lashes and filled the top liner with more MAC fluidline; then filled in the brows with Sleek's Bark & Noir from the Au Naturel palette and concealed under the eyes to finish:
I used Bourjois Healthy Mix foundation in 55 and my long lost Illamasqua Hussy blush (a lovely pink) on the cheeks. On the lips I used NYX JLP in Chaos first:

I then used a less brighter colour (and favourite paired with smokey eyes); UD SSLC in Lovechild:
And there you have it! 
Which look did you prefer? I'd love to hear your suggestions too on what colour combinations you'd wear!

FFF: Blue & Red makeup look with Book of Shadows IV

Saturday, 17 March 2012

This weeks FFF is from an old look I've had on my computer as I've been so busy this week! I've had two photoshoots (both of which I'll be posting pictures soon of) aswell as starting an internship, so I'm a lot busier these days but I'll make sure to keep up with blogging!

For this look the products used were:
Eyes:
> UDPP
> UD BOS IV: Zephyr, Skimp & Blue Bus
> Sleek Au Naturel palette - Noir & Bark
> UD 24/7 eye pencils in Zero & Deviant
> UD Ink for Eyes in Zero
> UD Cannonball mascara
> Khuraira ACC in Light
> MAC Studio Finish concealer - NC35
Face:
> Sleek blush in Fenberry
Lips:
> MAC lipstick in Such Flare!
> Vaseline

To start, prime the eyes with UDPP and follow with Zephyr on the inner corner and a little Skimp on the brow bone. Follow along the eyelid with Blue Bus, making it more intense at the outer corner and blending upwards. You can use a bit more Skimp to blend a bit better, removing any sharp lines.
Line the inner eye with UD Zero pencil and topliner with UD Ink for eyes in Zero too. Using Deviant 24/7 eye pencil, line the lower lashline.
Conceal under the eye and fill in the brows with Sleek Au Naturel palette - Bark (and Noir if required):
For the rest of the face I used Sleek blush in Fenberry on the cheeks and a bit of Vaseline followed by MAC Such Flare! lipstick:
Just a quick look this week, nothing too fancy haha!
Do let me know if you have any requests too.

 
template design by Studio Mommy (© copyright 2015)