Tuesday Takeover: Beauty and the Chic

Tuesday, 21 January 2014

This week's Tuesday Takeover is featuring the lovely Claudia from Beauty and the Chic.
I recently discovered her blog and love the clean friendly layout of it as well as the lovely clear pictures and easy to follow reviews, so be sure to check her out!

Urban Decay Revolution Lipstick - Obsessed
Hi FrootiBeauty readers, I'm Claudia and I write the blog Beauty and the Chic and I'm so excited to be guest posting for Safiyah today as I love her blog so much, I'm so addicted to copying her make-up looks, they are incredible. 

As a fellow Urban Decay lover, I decided to review one of their Revolution Lipsticks for you in the shade Obsessed. First off I have to comment on the packaging, the lipsticks are encased in the beautiful shiny gun metal grey with Urban Decay engraved on the side and UD on the top of the lid. They have to be one of the prettiest packagings out there. 
Obsessed is a baby pink shade which usually, I steer clear of as I thought it didn't suit my complexion however I feel this one does and it's become one of my favourite shades now. When I swatched this on my wrist, I loved how it felt moisturising and was very glad to find that it's lovely once applied to the lips too. I like to use mine after applying a lipbalm to make sure it doesn't sit in any dry patches and I found it was fine. I like to build this colour up so it's nice and bright and bold and I love the finished look. In the picture it gives off a very glossy look because of the balm underneath however, without a balm they do have a sheen to the finish and I really like this. I also found it didn't apply patchy at all, so top marks! Wear time is extremely good for me, it lasted about 3 hours and it didn't transfer easily which is always a plus as most of the lipsticks I own do transfer easily and it can be annoying. 

Now my next statement is very bold, I think these lipsticks are incredible and they have 100% taken over my first place choice of MAC lipsticks, don't get me wrong I still love them too but I have the over-powering need of wanting every shade of the Urban Decay line now and I prefer the packaging of these too, everything about these lipsticks I love.

Thank you again for letting me guest post and if you fancy having a read of my blog, feel free to pop over to Beauty and the Chic to say hi! 

Have you tried these lipsticks? What are your thoughts on them? 

Take care! 

Claudia xx 

FFF: Motives Brown-Copper Smokey Makeup Look - Pictorial!

Friday, 10 January 2014

[picture heavy post!]

Hello my lovelies! Hope you all had lovely holidays and had a nice break.

Mine was busy (of course) with makeup bookings for weddings, so unfortunately I haven't had time to review products or write full blog posts but I have gotten round to doing a makeup look for this week so I hope you enjoy!

Products used:
Eyes:
> UDPP - Eden
> NYX JEP - Black Bean
> Motives Pressed Eyeshadows in Cappuccino, Chocolight, Onyx and Whipped Cream
> Motives Photo Finish Powder in Neutral Medium

> Anastasia Beverly Hills Beauty Genius
> MAC pigment in Copper Sparkle  
> UD 24/7 Shadow Pencil - Demolition  
> Inglot AMC eyeliner gel - 77 (black)
> Daniel Sandler Jumbo Jet Mascara
> Motives
Color Perfection Quad in Medium
> Anastasia Beverly Hills Dip Brow Pomade - Ebony
> Eylure Girls Aloud lashes - Kimberley
Face: 
> Motives Color Perfection Quad in Medium
> Anastasia Beverly Hills Contour Kit - Fawn, Java, Havana for contour, Banana and Sand for highlight
> Motives blush in So Peachy
Lips: > Motives Lip Pencil in Naked
> Motives Rich Formula Lipsticks in Natural and Red Coral
> Motives for La La Mineral Lipstick in Naughty

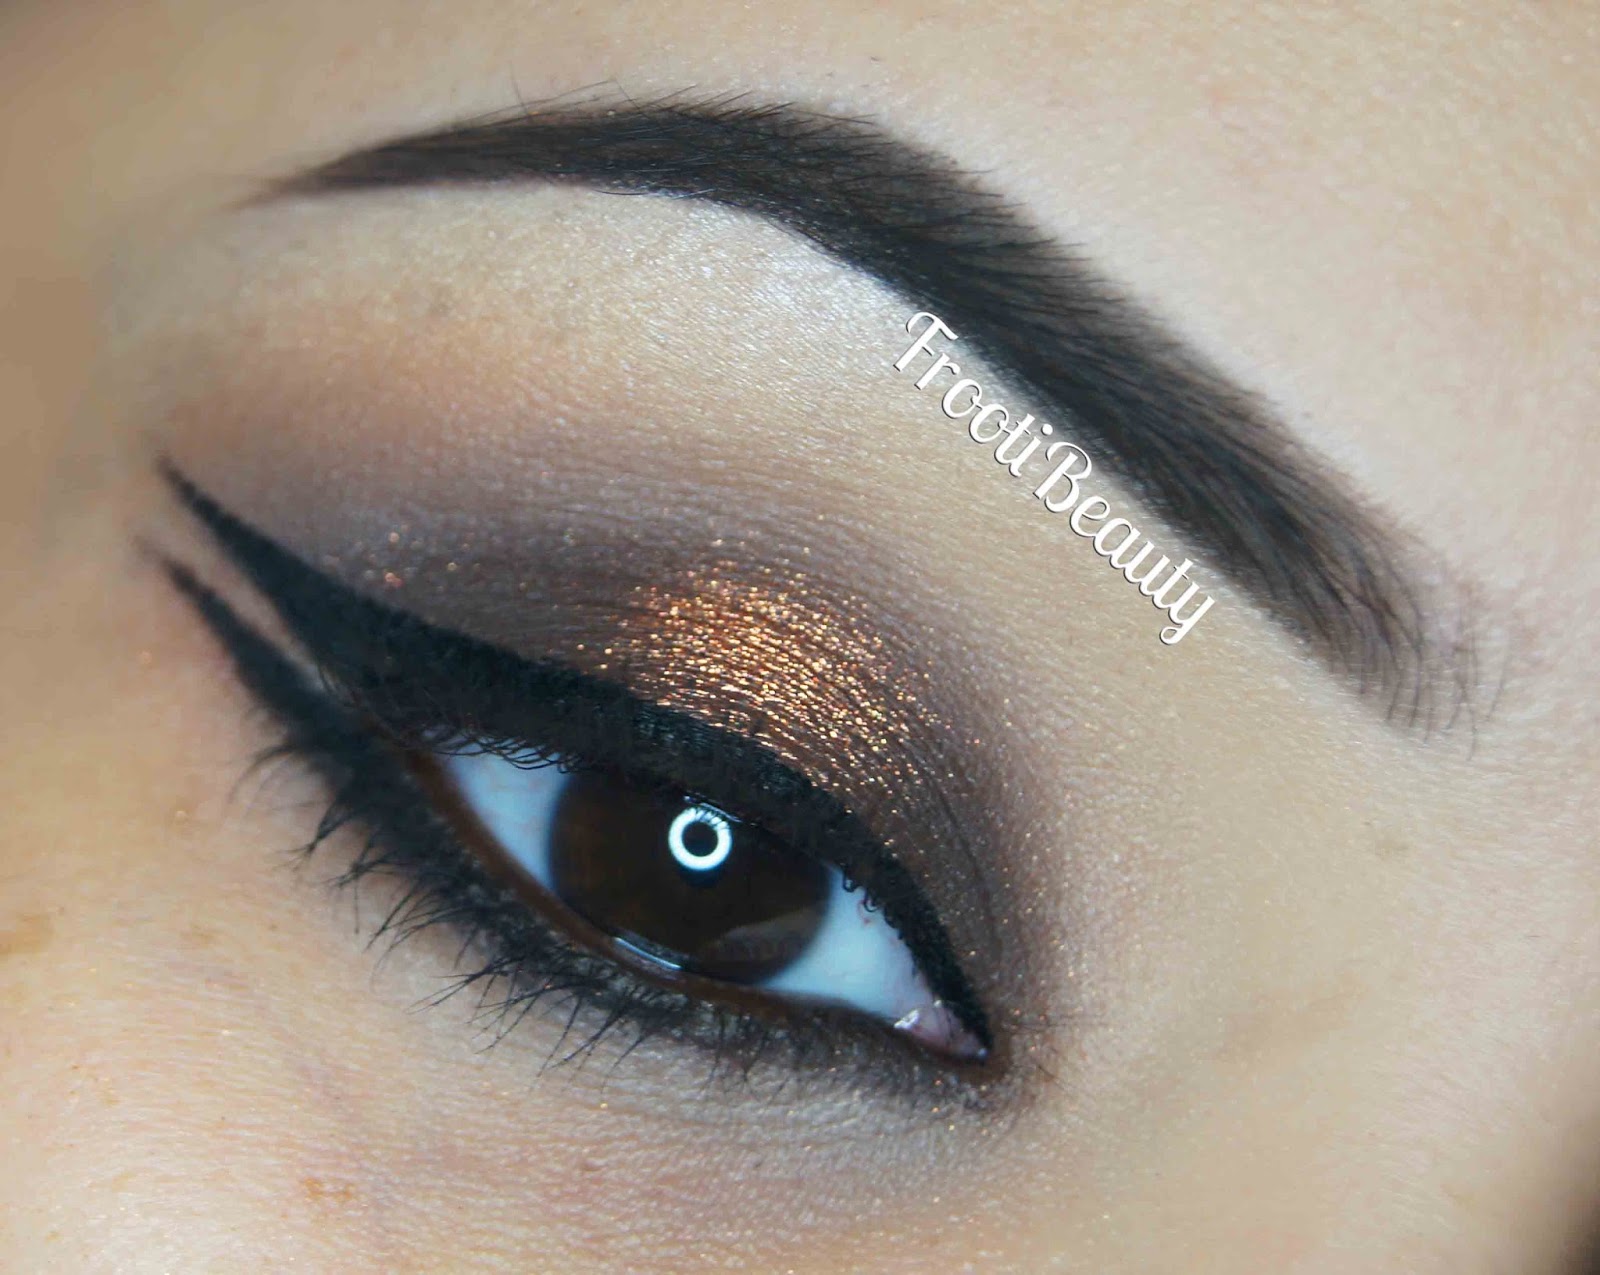
I started by filling in the brows with the my new favourite brow product: Anastasia Dip Brow Pomade in Ebony.
I then primed the eye with Eden PP and patting Whipped Cream eyeshadow to the brow bone with a flat brush. 
With a fluffy blending brush, I then applied Cappuccino lightly to the crease followed by Neutral Medium Photo Finish powder above this, blending to the brow bone highlight.
NYX JEP in Black Bean was then applied to the eyelid only, then gently patted with a flat brush to blend.
Using the same flat brush, Chocolight was patted over this and blended upwards into Cappuccino in the crease. 
I alternated between Cappuccino, Neutral Medium powder and Chocolight, taking the blending higher until I was happy:
I then added MAC Copper Sparkle with my finger tip to the middle of the eye using the Anastasia Beverly Hills Beauty Genius.
I went back with the flat brush and added more Chocolight to either side of the pigment patting to blend slightly but not too much.
I then outlined the top liner with an angled brush and Inglot Gel liner creating an extended wing at the outer corner of the eye (not forgetting the inner top eye).
I followed this wing from the bottom outer corner leaving a gap in between. 

UD 24/7 eye pencil in Demolition was used to line the bottom waterline whilst a pointy brush was used to smoke out the bottom lash line winged liner with more Chocolight eyeshadow. You can add Onyx eyeshadow to the crease with a fluffy brush and Whipped Cream eyeshadow to the inner corner too to highlight if desired).
The gap between the top and bottom double winged liner was then filled with another angled liner brush and Anastasia Beauty Genius with MAC Copper Sparkle.
The under eye was concealed and mascara to coat top and bottom lashes.
Finally Eylure Kimberley lashes were applied to finish off the eye makeup:
I created a collage with the main steps so that it's easier to follow too:
For the rest of the face, I used the Motives Color Perfection Quad in Medium and contoured and highlighted following the Dress Your Face contouring guide using the Anastasia Beverly Hills Contour Kit; I used Fawn, Java, Havana for contouring, graduating from light to dark, then Banana and Sand for highlighting.
Motives blush in So Peachy was used on the apples of the cheeks followed by the lip pencil in Naked with Rich Formula lipstick in Natural for the first lip combination:
I then used Motives Rich Formula lipstick in Red Coral:
Finally, I thought I'd up the drama with a dark lip too, using Motives for La La Mineral Lipstick in Naughty:
I realise now that the last couple looks have been with a smokey base; this was unintentional but I clearly seem to be loving smokey eyes at the mo so I hope you don't mind!

Would you wear this makeup look? Which lip colour do you prefer with the eye makeup?
 

FFF: MAC Nocturnals Black & Gold Pigment Set Makeup Look

Friday, 27 December 2013

This weeks FFF features a look using the MAC Nocturnals Black & Gold pigment set and a few Motives products.

I've recently bought a Ring Light attachment for my Sony Alpha 55 SLR camera so I thought I'd test it out with this look.. please bear with me as I'm playing with the settings to get the right colours/detail; unfortunately this batch of makeup looks' photos are grainier than usual as I had to use a higher ISO setting in the dark lighting condition I had despite using the ring light. If anyone wants to give me some help/tips on how to use the Ring Light in unnatural light (as my makeup looks are usually done at night), then please feel free to email me!

FFF: Purple-Pink Glittery Makeup Look

Saturday, 21 December 2013

Hello my lovelies!

This week's FFF is a Purple-Pink look inspired by my one of my newest acquisitions from my wishlist: the MAC Nocturnals Silver & Violet pigment set.

I haven't done a look with pink in a while it seems (aside from the Rose-Gold look from the Naked 3 palette of course!), so I hope you enjoy this one!

Products used:
Eyes: 
> UDPP - Eden

> NYX JEP - Black Bean
> MAC Nocturnals Pigments & Glitter Set - SIlver & Violet - Vanilla, Kitschmas, Push The Edge, Pink Glitter

> Motives Glitter Adhesive
> UD Naked Basics - Foxy, Naked2  
> UD 24/7 Shadow Pencil - Delinquent
> UD Perversion 24/7 eye pencil 
> Rimmel ScandalEyes Kohl liner in Nude 5 
> NYC black liquid liner 
> Daniel Sandler Jumbo Jet Mascara
> Estee Lauder Double Wear High Cover concealer - 2W
> Anastasia Beverly Hills Brow Wiz and Brow Powder Duo - Ebony
> Ardell Professional 120 Demi lashes 
Face: 
> Estee Lauder Invisible Fluid foundation 2WN1 
> Motives Sculpt & Shape Duo 
> MAC Bronzing Powder - Refined Golden
> UD Shattered Palette - Temper Blush
Lips:
> UD SSLC in Lovechild

I started by priming the eye with Eden PP and Vanilla pigment on the brow bone and inner corner with Push The Edge all over the eyelid, blending upwards. Naked2 from the Naked Basics palette above the crease and Foxy to blend the harsh edges.

I patted Kitschmas over the middle of the eyelid on top of Push The Edge and pushed it further out on either side of the eye. I then applied the Pink Glitter to the centre of the eyelids with Motives Glitter Adhesive and my finger.
Delinquent 24/7 Shadow Pencil was used for the bottom lashline with Rimmel Scandal Eyes Nude liner for the bottom inner eye, whilst UD Perversion eye pencil was used for the inner top eye.
NYC liquid liner was then used to line the top eyelid with a slight flick and after concealing under the eye with Estee Lauder concealer, I finished with Daniel Sandler Jumbo Jet mascara and Ardell 120 lashes, filling in the brows with Anastasia Beverly Hills Brow Wiz and Brow Powder Duo in Ebony, using it lightly:
For the rest of the face, I used Estee Lauder Invisible Fluid foundation and for the cheeks I used both the Motives Shape & Sculpt Duo and MAC Bronzing Powder in Refined Golden with a bit of Temper blush from UD.
On the lips I decided to keep it a light pink and went for the UD SSLC in Lovechild:

Trying to capture the sparkle!
I hope you enjoyed this makeup look, it can be used with other colours too which is great, so I would love to see if you recreate something like this!

Would you wear this look? What colours do you think would look nice with this particular look?  

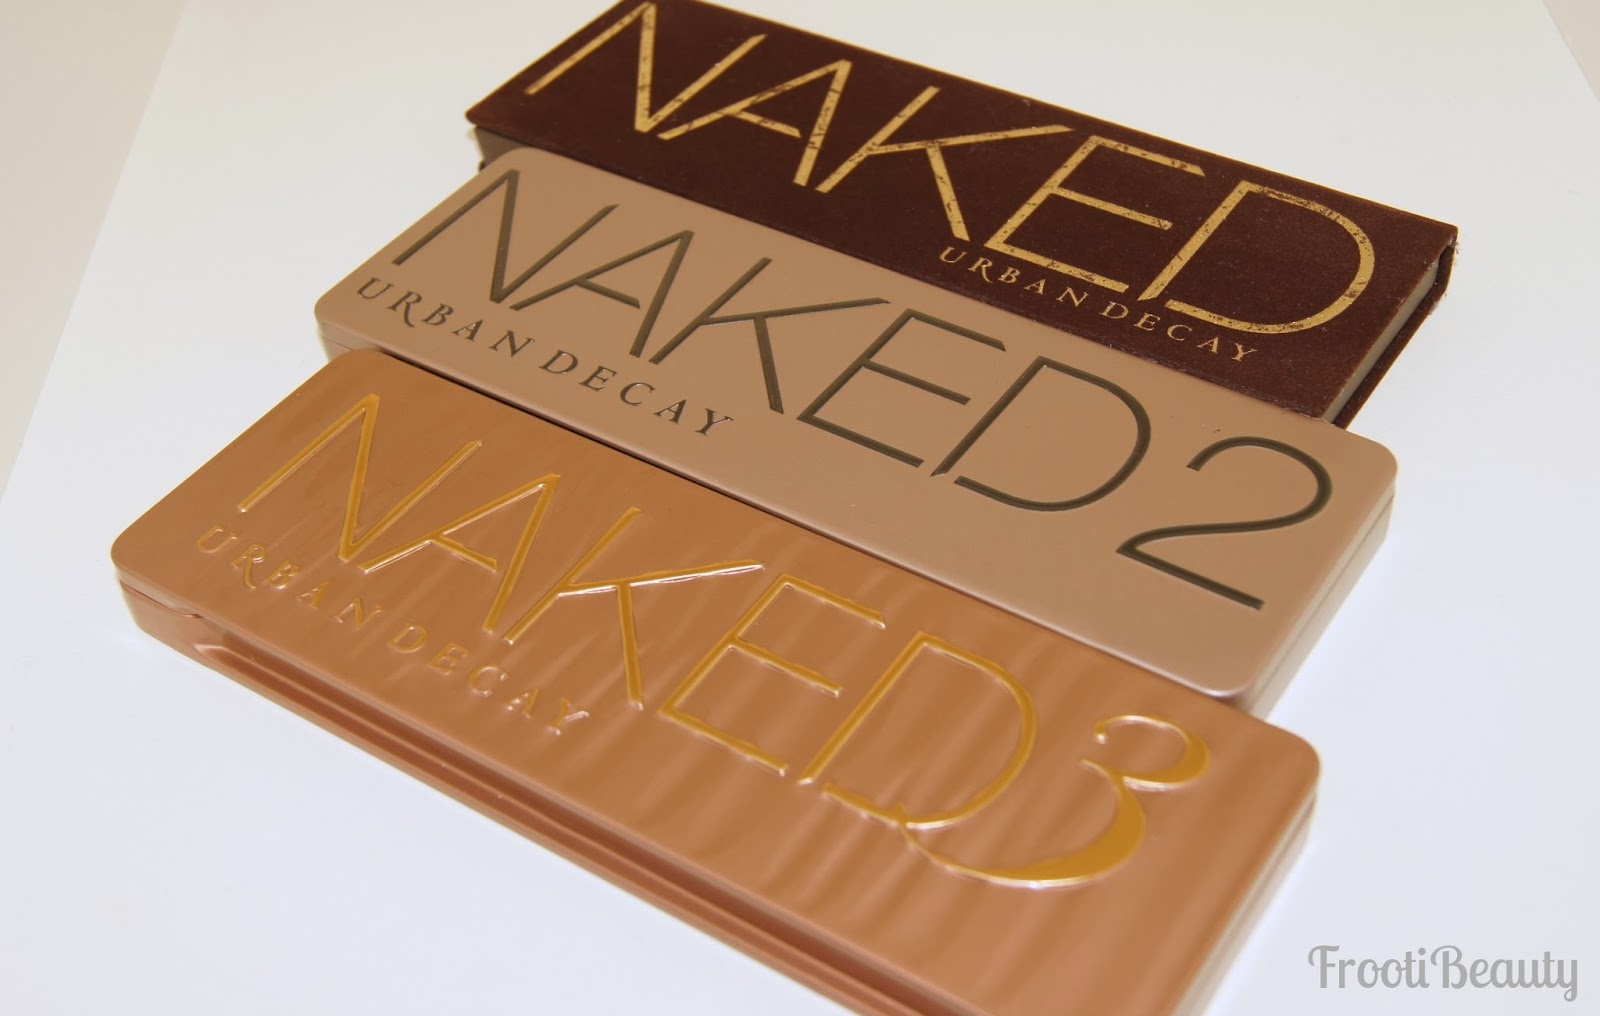
Safiyah's Guide to Naked Palettes

Wednesday, 18 December 2013


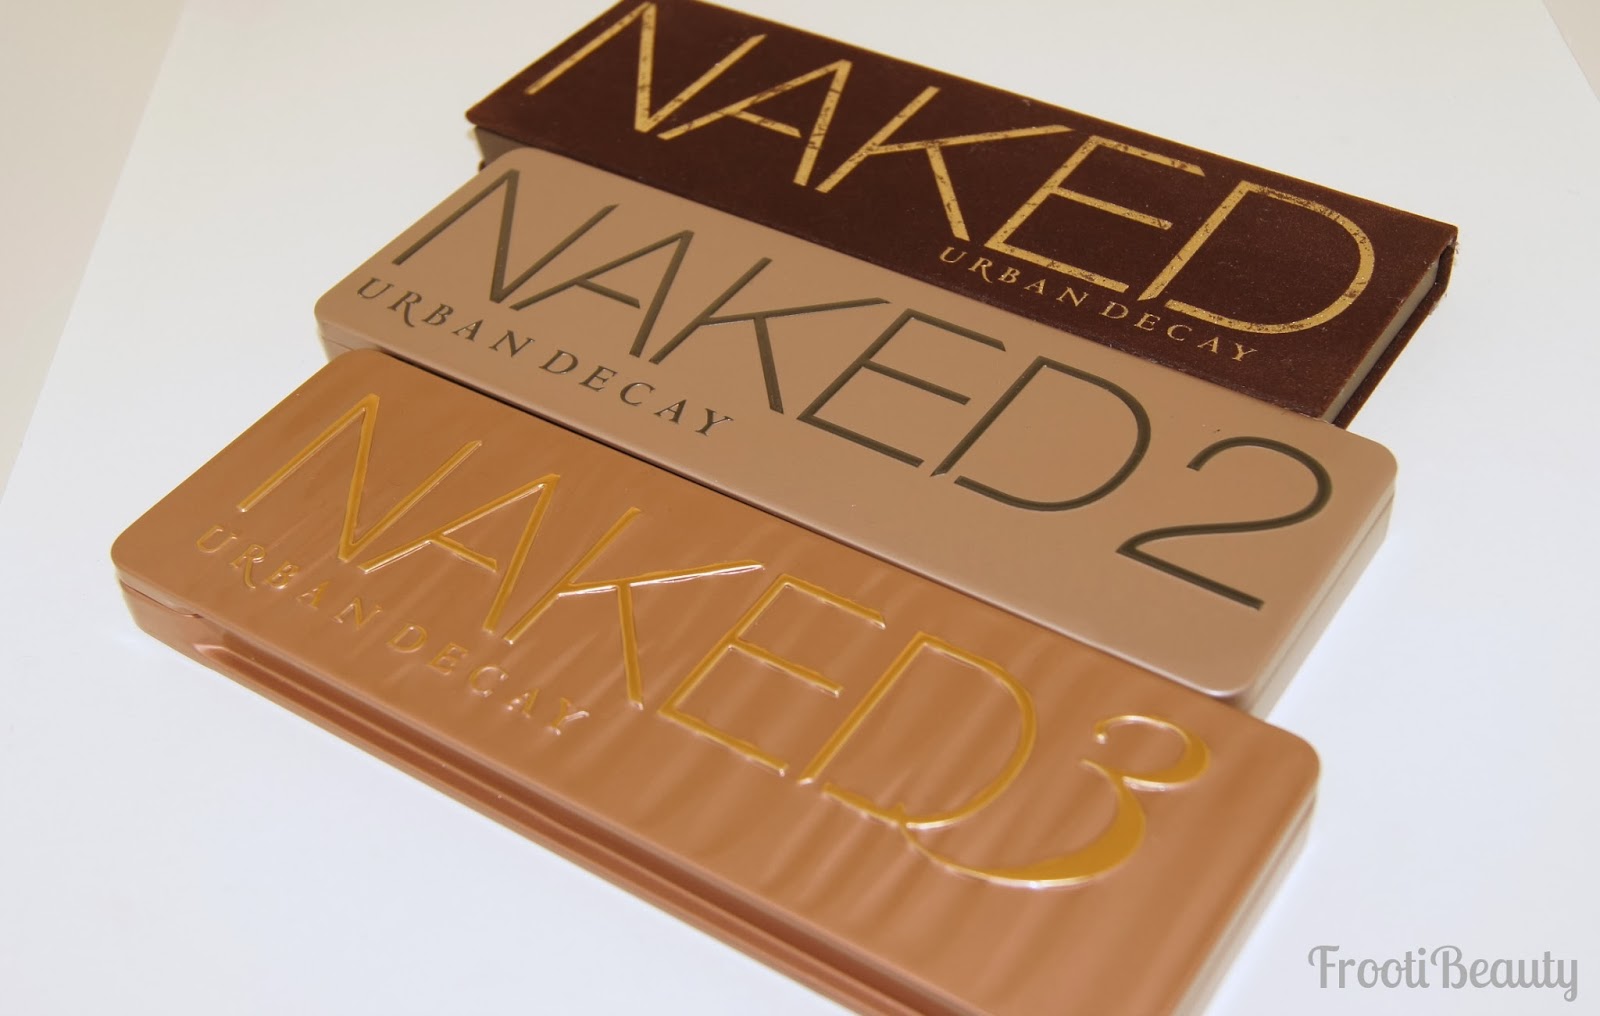
In all the excitement of the new Naked 3 Palette release, I know there has been some confusion in which to buy for a lot of people, so I thought I'd break it down in my opinion and experience with the 3 palettes.  

Despite the three palettes being neutral shades, each palette offers a range of neutrals to suit every skin tone. 
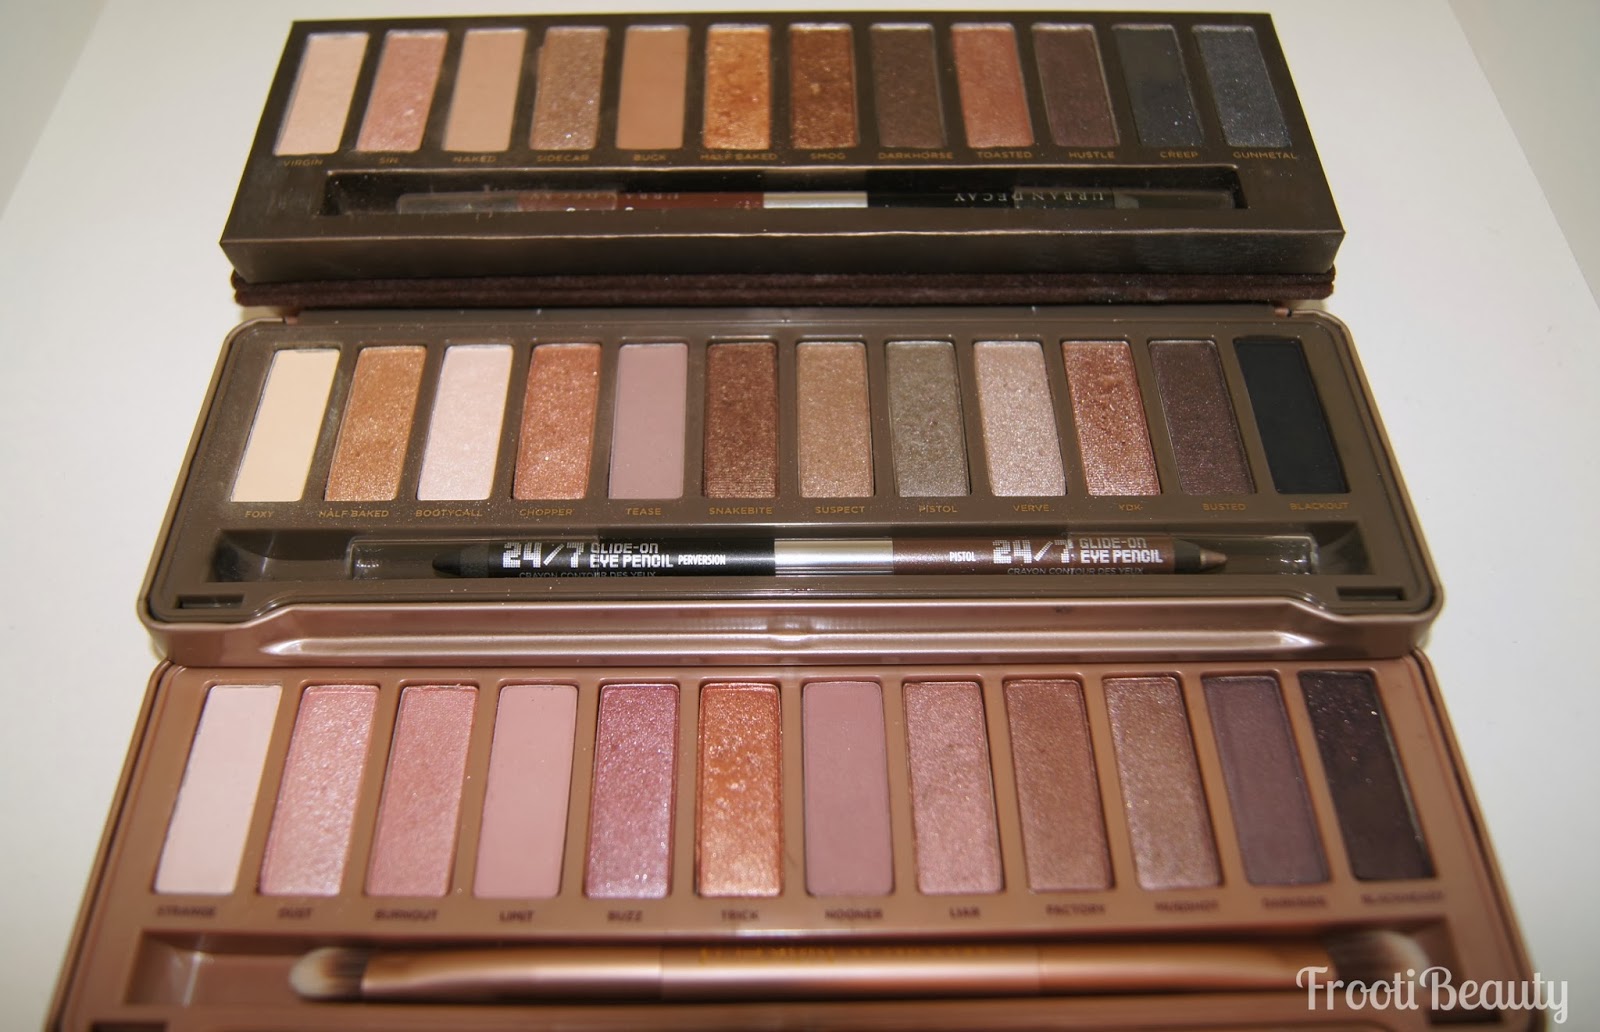
They each have colours that would suit fair and deep tones alike, for example the golds Half Baked/Trick; or bronzes Smog/Snakebite; or plums Hustle/Busted).
However, I think some palettes look darker on fairer tones and the new Naked 3's matte shades will look too chalky on deeper tones (still yet to be 100% confirmed!)

Laid out together you can see the difference in palettes:

As a guide, I'd say the following palettes are best suited to these MAC skintones based on the matte blending/transition shades in each palette:
  • Naked 1 (Bronze neutrals): Medium to Deep skintones (both yellow toned and pink/red tones)  [MAC shades NC25s+ and NW18+] {blog post here}
  • Naked 2 (Taupe neutrals): Fair to Medium skintones (both yellow tones and pink/red tones)  [MAC shades NC15-40 or NW10+] {blog post here}
  • Naked 3 (Rose neutrals): Fair to Medium skintones (mostly pink tones, some yellow tones)  [MAC shades NW10+ and NC15-35] {blog post here}
  • Naked Heat (Red neutrals): Warm to Dark skintones (mostly warm red tones) [MAC shades NW/NC25+] {blog post here}
  • Naked Smoky (Dark neutrals): Light to Medium skintones (mostly dark greys/browns) [NW/NC10-25] {blog post here}
  • Naked Ultimate Basics (Matte Neutrals): All/most skintones as there's a matte transition type shade to suit most skintones! {blog post here}
Like I said above, this guide isn't strictly to be followed as the shimmery shades in all 3 palettes can be worn on pretty much every skintone, so my guide is just based on using the matte shades really!

I hope this helps in deciding which palette is best for you (if you're not a collector/UD junkie like me). 
  
All three Naked Palettes are now available to buy at the following retailers (if they're not already sold out for Christmas!):
House of Fraser, and John Lewis.

Do you have a Naked Palette? Which is your favourite?


Sunday Swatches: Estee Lauder Pure Color Metallics 2013 Review

Sunday, 15 December 2013

Estee Lauder has been one of the beauty industry's most established brand for over 60 years now and though I've never really blogged about individual products, it's been cropping up in my makeup wardrobe a lot more these days as I've found the brand is more appealing to both younger and maturer customers.

My most reached for foundation every day is now the Estee Lauder Invisible Fluid foundation (which I will be doing a foundation post on very soon!)

Colour Cosmetics
Pure Color has been a range of colour makeup for the eyes, lips, nails and face for a while and this Holiday 2013 has included the new Pure Color Metallics which feature new:
  • High Intensity Lip Lacquers - 12 shades
  • Vivid Shine Nail Lacquers - 8 shades
  • Vivid Shine Lipsticks - 6 shades
  • Instant Intense Eyeshadow Trios - 9 shades 
Although I'm more of a lipstick girl these days, the High Intensity Lip Lacquers (HILLs) caught my eye as they promise the full impact of a lipstick, but with hydrating ingredients that last on the lips.
The Intense Eyeshadow Trios (IIETs) also had my attention as some of them sparkle so brightly, and being a magpie attracts me to things like that!

I've picked my favourite shades from the collection this year to review; of the Lip Lacquers I loved the bright orange "Melting Sun" which has flecks of glitter in it, and also the plummy "Wet Plum" which has no shimmer or glitter.
Of the Eyeshadow Trios the one that stuck out most to me was the Steel Lilacs trio as it's both purple and super sparkly.

High Intensity Lip Lacquers

As aforementioned, these glosses hold all the pigmentation of a lipstick but with super shine and hydration that lasts on the lips.
Colour & Pigmentation: The pigmentation of these glosses are pretty amazing, they do have a major colour payoff and with the brighter shades (like Melting Sun and Wet Plum), they can even stain a little (see non-lip swatches in Intense Eyeshadow Trios review below).
Texture: The texture is quite thick and while I wouldn't say it's really sticky, there is a slight "stick" to it for those who aren't keen on that kind of texture.
Packaging: The classic gold lids with the embossed "EL" logos give a feeling of luxury, whilst the paddle type plastic applicator is curved in the middle to hold a reservoir of gloss and also serves as a fairly precise applicator for the cupids bow area.
Longevity: This Lip Lacquer is said to last up to 6 hours, however I felt the glossiness/stickiness wore away after about an hour or so, but the stain (particularly in Wet Plum) meant the colour was still on the lips at least 3 hours later with eating and drinking.
Scent: I love the scent of these as it's a sweet sugary smell!
Price: At £21 each, they are a more premium price than your regular lipgloss, however because of the lipstick/gloss hybrid and longevity, it's definitely one that would be good to stick in your handbag for everyday if you wanted, or for going out equally.


FrootiFactor: Despite the fact I'm not usually a gloss kind of girl, I adore the scent and colour saturation/pigmentation in these Lip Lacquers, so I'd give them at least a 4:

Instant Intense Eyeshadow Trios

These eyeshadow trios are designed to highlight and define the eyes and contain a little clear plastic guide on where to apply the shadows on the eye to do so:
Colour & Pigmentation: This particular eyeshadow trio was very sparkly and had fairly high pigmentation despite the sparkle (see swatches above). It's hard to try and capture the true sparkliness of this trio but you can see a bit from the middle picture above that it's pretty damned glitzy.
Texture: Due to the glitteriness of the shadows, they are a bit crumblier than a normal eyeshadow, however I find these type of shadows apply best with the finger.
Packaging: Again, the shadows are encased in the classic gold EL packaging with a handy mirror in the lid. The applicator is a regular spongy one.
Longevity: These trios are supposed to last 10 hours but I haven't quite tested that out yet as I'm yet to wear the shadow for that long; the glitter did however stick to my arm fairly well after applying with no primer, so it may well be true!
Price: At £27 each, they are a again a slightly premium price to pay for a trio of eyeshadows, but would make a lovely gift for a true Estee Lauder fan and of course a fan of sparkle, particularly for Christmas!


FrootiFactor: I loved the sparkliness of the shadows, however I found the texture quite dry to work with, so I'd give the shadows a 3-3.5 out of 5:
Estee Lauder products are available to buy from the Estee Lauder website, as well as the regular department stores (Debenhams, House Of Fraser, John Lewis etc) and Boots.

Which is your favourite Estee Lauder product and why?


template design by Studio Mommy (© copyright 2015)