Showing posts with label Naked2. Show all posts

Safiyah's Guide to Naked Palettes

Wednesday, 18 December 2013


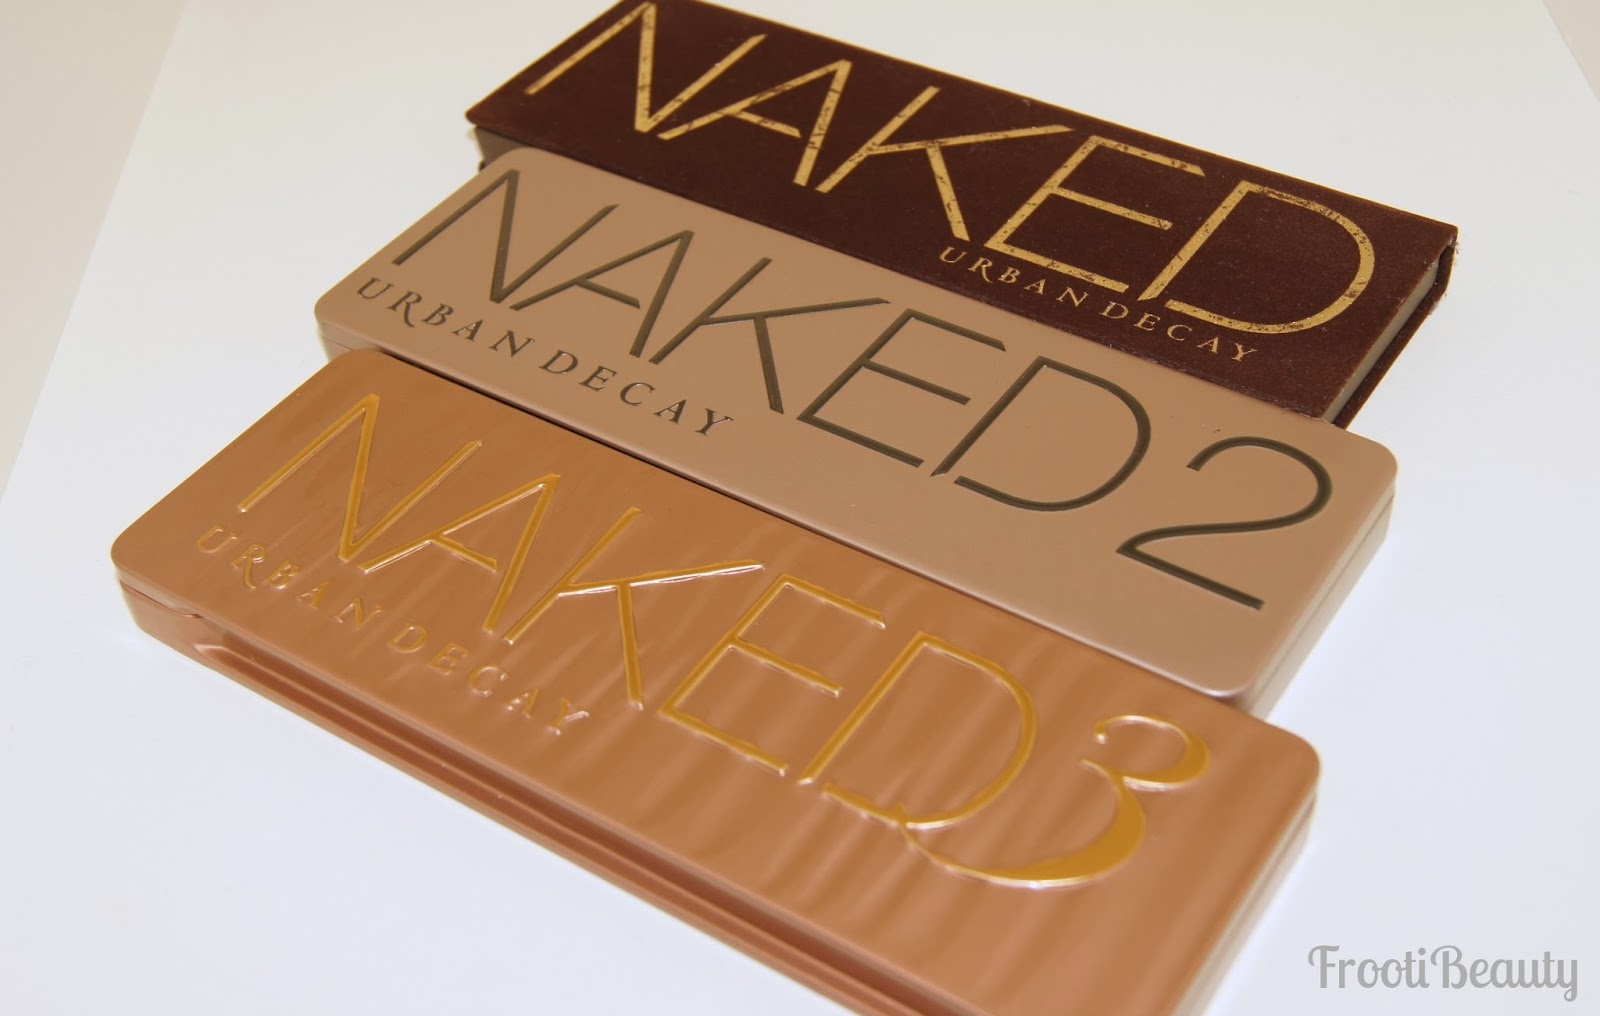
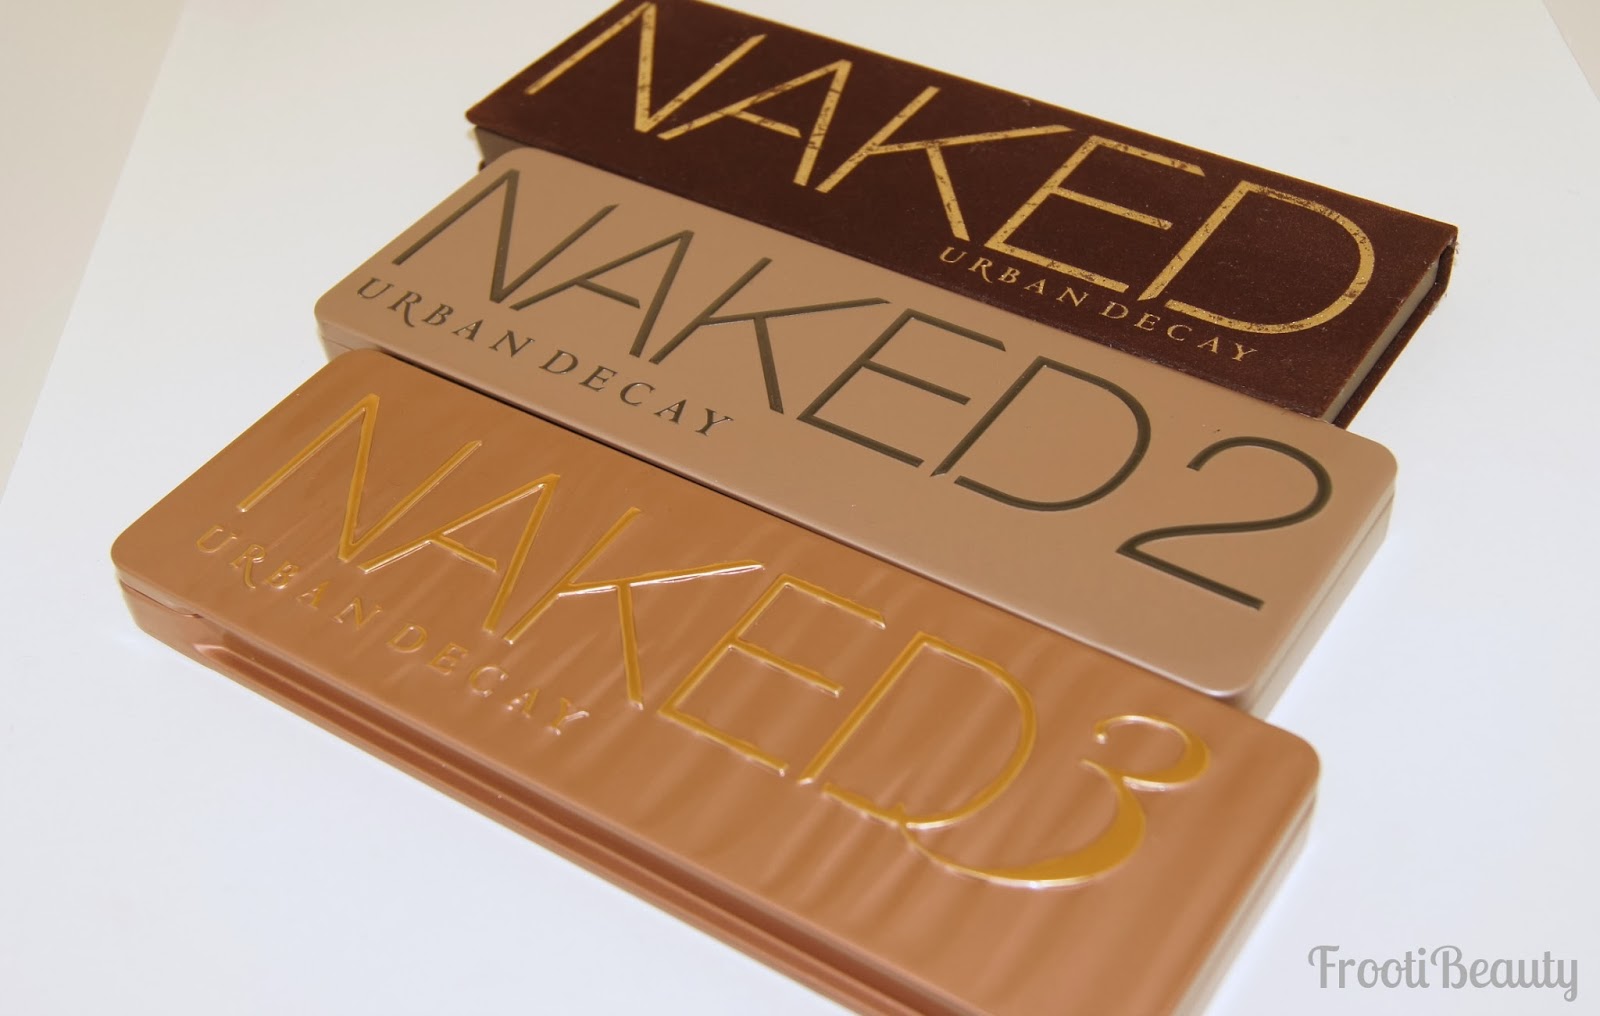
In all the excitement of the new Naked 3 Palette release, I know there has been some confusion in which to buy for a lot of people, so I thought I'd break it down in my opinion and experience with the 3 palettes.  

Despite the three palettes being neutral shades, each palette offers a range of neutrals to suit every skin tone. 
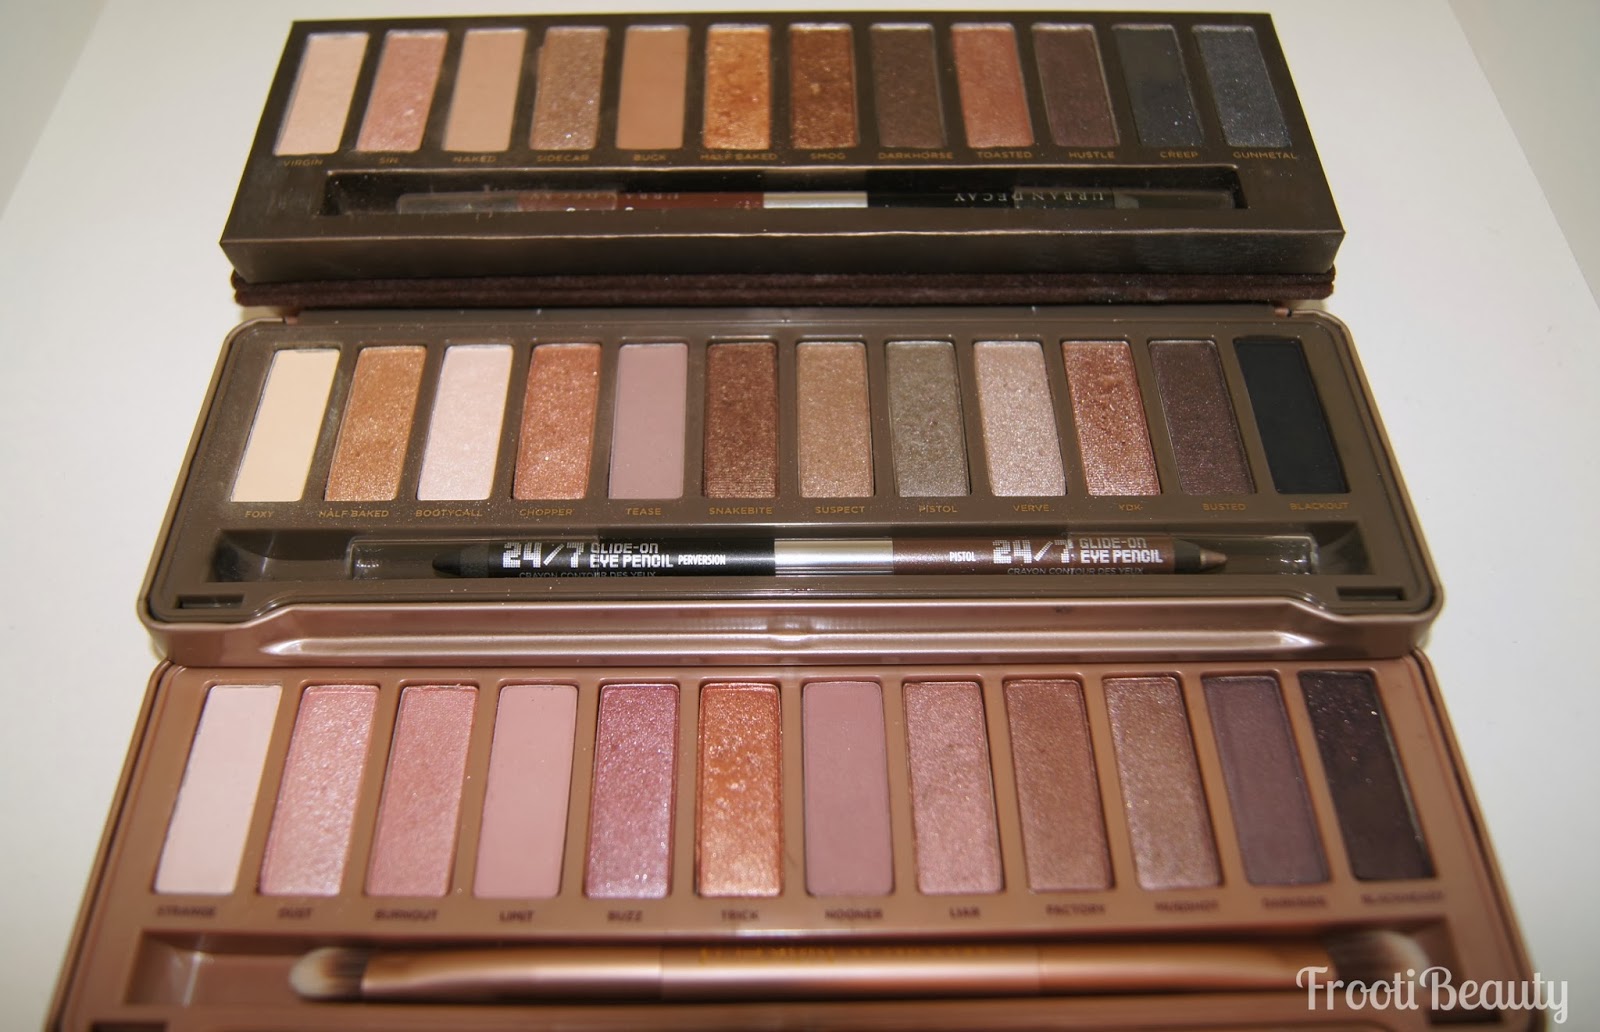
They each have colours that would suit fair and deep tones alike, for example the golds Half Baked/Trick; or bronzes Smog/Snakebite; or plums Hustle/Busted).
However, I think some palettes look darker on fairer tones and the new Naked 3's matte shades will look too chalky on deeper tones (still yet to be 100% confirmed!)

Laid out together you can see the difference in palettes:

As a guide, I'd say the following palettes are best suited to these MAC skintones based on the matte blending/transition shades in each palette:
  • Naked 1 (Bronze neutrals): Medium to Deep skintones (both yellow toned and pink/red tones)  [MAC shades NC25s+ and NW18+] {blog post here}
  • Naked 2 (Taupe neutrals): Fair to Medium skintones (both yellow tones and pink/red tones)  [MAC shades NC15-40 or NW10+] {blog post here}
  • Naked 3 (Rose neutrals): Fair to Medium skintones (mostly pink tones, some yellow tones)  [MAC shades NW10+ and NC15-35] {blog post here}
  • Naked Heat (Red neutrals): Warm to Dark skintones (mostly warm red tones) [MAC shades NW/NC25+] {blog post here}
  • Naked Smoky (Dark neutrals): Light to Medium skintones (mostly dark greys/browns) [NW/NC10-25] {blog post here}
  • Naked Ultimate Basics (Matte Neutrals): All/most skintones as there's a matte transition type shade to suit most skintones! {blog post here}
Like I said above, this guide isn't strictly to be followed as the shimmery shades in all 3 palettes can be worn on pretty much every skintone, so my guide is just based on using the matte shades really!

I hope this helps in deciding which palette is best for you (if you're not a collector/UD junkie like me). 
  
All three Naked Palettes are now available to buy at the following retailers (if they're not already sold out for Christmas!):
House of Fraser, and John Lewis.

Do you have a Naked Palette? Which is your favourite?
 

FFF: Smokey Green makeup look, YT tutorial + 3 contour techniques too!

Saturday, 16 March 2013

Hello my lovely Frooti's and Frootettes!

I've finally managed to follow up with another video tutorial after my last debut in November-December (shocking, I know!). Not only that but I included 3 ways to contour, but did them all in one go for extra emphasis in this look.

I posted this look a couple weeks back on Instagram from my phone (I couldn't wait, obviously), so I've finally managed to edit the video and write up a blog post to go with it; go me!

Hope you enjoy this tutorial, thanks for the feedback from the last video, I've taken on board the comments and tried to make it better.

Products used:
Eyes: 
> UDPP
> Naked 2 palette - Blackout, Tease, Foxy
> Vice palette - Junkie
> UD Perversion & Junkie 24/7 eye pencils
> NYC black liquid liner
> Daniel Sandler Jumbo Jet mascara
> Khuraira ACC in Light  
> ELF black cream eyeliner
Face: 
> UD 24/7 concealer pencil in ATF
> UD Naked Skin in 7.0
> Illamasqua Blush Duo - Lover & Hussy (Lover only used)
> Sleek Contour Kit in Medium (matte brown shade & highlight only)
Lips:
> UD Naked lip liner
> Illamasqua Immodest lipstick

After priming the eye with UDPP, I added Blackout (Naked 2) to the whole lid with the brush included in the UD Vice palette (flat shadow brush), extending it slightly beyond the outer corner of the eye. Using the fluffier crease brush on the other side of the brush, I blended back and forth to soften the harsh lines.
Foxy was added to the brow bone with a blending brush and blended slightly down. I then added Tease with a Sigma E45 tapered blending brush to the crease and blended between Blackout and Foxy.
I then added Blackout with a shorter buffing brush by Crownbrush to the bottom lash line and lined the inner eye with UD Perversion eye pencil. You can add more black to the lid if you've blended too much at this point. Add Junkie eyeshadow to the lids only with a flat eye shadow brush, then add Junkie eye pencil to the lower lashline too.
Clean up under the eye with a makeup wipe, then add NYC black liquid liner to the top lash line. Curl the lashes and add Daniel Sandler Jumbo Jet Mascara.
Conceal under the eyes with Khuraira ACC in Light, then blend upwards cleaning up the eyeshadow line with the Real Techniques Pointed Foundation brush.
Fill in the brows with an angled brush and ELF cream eyeliner in black.
For the rest of the face I then concealed with the UD ATF 24/7 concealer stick where needed, and used 3 different contour methods:
1) Add foundation 3-4 shades darker to the hollows of the cheeks. I used Graftobian HD Creme foundation in Midnight Marigold for my contours with the Real Techniques Pointed Foundation brush.
I then added Naked Skin foundation to the face with the UD Optical Blurring brush, but stippling/patting only around the contour area.
2) I then contoured lightly with the Real Techniques Contour brush and with Sleek's Face Form in Medium, using only the matte shade in the hollows of my cheeks again.
3) Another contour method which I have now adopted into my daily routine is simply using the Illamasqua Blush Up brush (review here). I stippled on the matte colour in the Face Form to the area needed and blended upwards with the brush and also with the RT Contour brush to blend even more.

I then added Illamasqua Lover blush to my cheeks with the UD blush brush and highlighted the top of my cheeks with the Face Form highlighter.
Finally I lined and filled the lips with UD Naked lip liner and added Illamasqua Immodest on top.
The YouTube video can be found here and I've added it below too; let me know your thoughts/recommendations as ever, I'm still new to the whole video thing and get mildly stressed out by the whole editing process! I'd love to make them more frequently but to be honest I find blogging easier.


If you do recreate this look, I'd love to see it so please feel free to leave a comment below with your link or you can tweet me =)


FFF: Illamasqua Speckled Eyeliner makeup look

Friday, 1 March 2013

FFF is finally back after a little break.. and I thought I'd follow on from the last post with a speckled eyeliner look.
After the Illamasqua ImPerfection launch (read about it here), I felt so inspired after seeing Alex Box demonstrate the speckled eyeliner technique. I decided to do my own version as in the visual from the campaign (at the bottom of this post), but with normal black eyeliner and gold. 
I posted a preview on my Instagram (above) but here is the full look with the rest of the ImPerfection products:

Products used
Eyes:

> UDPP- Greed (yellow gold)
> UD Naked 2 - Bootycall, Tease & Blackout (eyebrows)
> NYC black liquid liner 
> UD 24/7 liquid eyeliner in El Dorado
> Rimmel Scandaleyes waterproof kohl kajal in 005 "Nude"
> Daniel Sandler Jumbo Jet mascara
> Khuraira ACC in Light 
Face: 
> Graftobian HD foundation - Desert Sand
> Illamasqua Blush Duo in Hussy & Lover
Lips:
> Illamasqua Immodest lipstick

After applying UDPP in Greed all over the eyelid, I used the NYC black liquid liner to create a simple fairly thin winged liner, then speckled with the same black liner along the wing. I then went in with the UD gold liquid liner (El Dorado) which is slightly glittery and did the same speckled effect on the eyeliner wing and followed it on to the main liner on the rest of the lid. Using a crease brush I then slightly contoured the eyelid using Tease in the crease and Bootycall on the brow bone. Blackout was used to fill the eyebrows with a angled brush. I lined the bottom inner waterline with the Rimmel Scandaleyes eyeliner in Nude and finished off the eye with the Daniel Sandler Jumbo Jet mascara on top and bottom lashes and concealed under the eyes with Khuraira ACC in Light.
I used the Graftobian HD creme foundation lightly all over the face then using the blush up brush, lightly added both Hussy and Lover blushes, using Lover more than Hussy.
For the lips I used the new Illamasqua Immodest liptick:

I think the speckled eyeliner effect is really wearable when worn subtly like this, particularly if you dress it down with a nude liner on the waterline; I love how easy it is too!

Here's the original ImPerfection campaign visual that inspired me:
The flash on my camera washed out my blush unfortunately (it was a bit more prominent like in the promo image!), but I loved doing this look nevertheless. 

Would you wear this speckled look? What colour combinations would you try?


FFF: Light-Green smokey makeup look

Friday, 4 May 2012

This weeks FFF was another request, for a light green bridesmaid dress:
I also had another clothing item to do (below) and thought this look could work for that too, maybe changing the bottom liner to turquoise or choosing a more vibrant light-blue/turquoise eyeshadow instead of Flipside.
Products used:
Eyes:
> UDPP
> NYX JEP in Milk
> UD Fun Palette - Uzi & Flipside
> UD Naked2 Palette - Pistol & Blackout
> Sleek Au Naturel palette - Honeycomb, Bark & Noir
> UD 24/7 liquid liner in Perversion
> UD 24/7 eye pencil in Zero & Dime
> Daniel Sandler Jumbo Jet mascara
> Khuraira ACC in Light
> MAC Studio Finish concealer - NC35
Face:
> UD Surreal Skin Cream to Powder foundation - Supernova
> Kiko Warm Tangerine Glow blush palette - peach blush & bronzer
Lips:
> MAC Crosswires lipstick

After priming the eye with UDPP & NYX JEP in Milk I applied UD Uzi eyeshadow (silvery shadow with silver glitter!) to the inner corners of the eyes and Flipside to the middle of the eyelid. Pistol from Naked2 was used in the crease and outer corner of the eyes, buffing it upwards slightly, followed by Honeycomb (Sleek Au Naturel palette) on the brow bone, blending down into Pistol. I also applied a bit of Blackout to the outer corner of the eye to intensify the smokiness.
UD 24/7 eye pencil in Uzi was added to the lower lash line followed by Zero on the inner eye. Topliner was done with UD 24/7 liquid liner in Perversion and set with a liner brush and Blackout eyeshadow. 
Daniel Sandler mascara was wiggled into the lashes followed by Sleek's Bark & Noir from the Au Naturel palette for the brows; Khuraira & MAC concealers were used under the eye:

For the rest of the face I used UD cream to powder foundation in Supernove and Kiko tangerine palette - peachy colour on the cheeks and the bronzer along the cheekbones; for the lips I used MAC Crosswires lipstick:

And there you have it.. Hope you liked this weeks look, do let me know if you have any requests!

FFF: Naked 2 makeup look with ombre lips!

Friday, 24 February 2012

Hey guys!
It's been a busy week, what with the Bourjois event on Monday and the Superdrug event yesterday (post still to come!)
I've had this makeup look lying around on my computer since I first got the Naked 2 palette and all the new Spring collection (hence the heavy use of UD products!) so I thought it was about time to post it.
It's a very very basic and neutral look, the emphasis is on the lips for this one (I blurred the rest of my face) so I hope you like! 

Products used:
Eyes:
> UDPP
> UD Naked 2 - Bootycall, Chopper, Tease, Foxy & Blackout (for eyebrows)
> UD 24/7 eye pencil in Perversion & Demolition
> UD Lush Lash mascara
> UD Brow Box in Brown Sugar
> UD concealer in NSA
Face:
> UD cream to powder foundation - Supernova
> UD Baked Bronzer - Toasted
Lips:
> UD SSLC in Lovechild & Apocalypse

After applying the Supernova foundation all over the face and priming the eyes with UDPP, I started the eyeshadow by applying Foxy to the brow bone and Bootycall to the inner corner of the eyes. Chopper was added to the middle and end of the eyelids. Tease was used for the crease/outer V and blended slightly upwards and into the Foxy on the brow bone.
Demolition eyeliner (matte brown) was used on the bottom lashline, fairly thick, whilst Perversion (blackest black) was used for the topliner (and to line the inner eyes).
After filling the brows with the brow box and a little Blackout from the Naked 2 palette, I finished the eyes with the Lush Lash mascara and concealer, whilst also cleaning up any round edges on the outer corner of the eyes with a cotton bud.

For the rest of the face I used Toasted bronzer on the cheeks and T-zone; the lips however were fairly trickier to do, so if you decide to do this look, it's something I wouldn't recommend for wearing whilst eating.. or going out for that matter!
To start off, I applied Apocalypse to the top lip and Lovechild to the bottom lip. Very gently, I patted the lips together (as you do on tissue!) but only the inside of the lips.. you dont want to just mix Apocalypse and Lovechild and create a new colour, you want a graduation of dark to light!
You may need to reapply either colour again and pat lips again, and maybe even use your finger to blend a bit, but it should end up looking something like this:
And the whole face:
So as you can see, the emphasis is mainly on the lips this time, not so much on the eyes.. I got the idea from a magazine and personally love anything ombre-d; hair, nails, lips, you name it!
What do you think of this look? Not very practical I know, but I love it all the same!

Naked2 Palette.. swatches and review!

Monday, 9 January 2012

I thought I'd jump ahead of the blogging queue of swatches and reviews (in the UK that is) of the Naked2 Palette. As you may know, the UK got their first chance of getting their hands on the much awaited palette on Friday night via the Debenhams website selling for £36. The palette will be sold officially from today (Monday 8th) online and then in stores from the 6th February 2012.
So if you don't already know, the hype of this palette comes after the original Naked palette became the world's best selling palette (or there abouts!). It definitely has won a lot of awards and has become a makeup wardrobe staple for many.

Naturally, the sequel caused a bit of a commotion when it arrived at the UK too (an hour earlier than expected), with people claiming they were going to die if they didn't get it and so on.
Anyway, thanks to the lovely PR people at Urban Decay I managed to get my hands on the palette and some of the new Spring products that I'll be blogging about separately. 
Many bloggers have said that this palette is a lot cooler than the original Naked palette and to some extent it's true but I find it's not as cool as I was led to expect. Here's a close up of the shades, to get a better view:
 
The palette comes with a generous sized mirror in the lid (filling the entire lid), a double ended Good Karma brush (with the crease brush on one end and shadow on the other) and instead of the usual primer sample, you get a lip junkie in the shade "Naked" (very coordinated!).
On to the swatches then:
And up close:
 
 
  • Foxy (cream bisque - matte finish)
  • Half Baked (golden-bronze- shimmery finish) 
  • Booty Call (cork - shimmer)
  • Chopper (copper shimmer with silver micro glitter) 
  • Tease (pale purple-brown - matte)
  • Snakebite (dark bronze shimmer with metallic base)
  • Suspect (pale golden beige - shimmer) 
  • Pistol (light greyish brown - shimmer)
  • Verve (oyster - shimmery)
  • YDK (cool bronze shimmer with metallic base)
  • Busted (deep brown -shimmer)
  • Blackout (blackest black - matte)
As you can see the colours are slightly more silver-toned, but nevertheless browns/neutrals. My favourites from the original Naked palette were Half baked, Smog and Darkhorse. In this palette, Half baked is the only repeat which I still love and Snakebite is very similar to Smog (a warm chocolatey brown). Darkhorse can be recreated with Snakebite and Blackout mixed together though so all is fine if you have to choose between first or second Naked palette.
I would recommend Naked2 simply because there are more matte colours (which are harder to find in good quality) and also because the packaging and the brush is better too. Some of the colours are also very similar, like Bootycall (NP2) and Virgin (NP1) and Snakebite (NP2) and Smog (NP1).
As for the lip junkie, the colour is very wearable by many skintones, it's a pinky shimmery neutral:
So there you have it, the Naked2 palette in swatches; Urban Decay products are available to buy from Debenhams and House of Fraser stores or online at beautybay.com, hqhair.com and lookfantastic.com

What do you think of this palette? Will you be buying it if you haven't already? And which do you personally prefer?
<3
 
template design by Studio Mommy (© copyright 2015)