FFF: Copper-Green Cut Crease makeup look - collaboration!

Friday 29 March 2013

This weeks FFF is a special one as it's also a collaboration with another MUA blogger - Sanna of Look A Million.

I discovered Sanna on Instagram and loved her creativity and flair! There's a ton of makeup artists on Instagram and online in general, but only a handful actually wow me and Sanna has to be one of them. 
"I am a self-taught freelance makeup artist, blogger, student and upcoming YouTuber based in West Yorkshire. Makeup is my passion and I have been practising from a very young age! I love to create a range of different looks from simple, elegant, dramatic and theatre. I love the creative side of makeup as makeup lets you be whoever you want and can change your appearance drastically (which is the fun bit). I love to explore different genres and themes. 
My favourite all time makeup brand has to be Illamasqua- their products are so pigmented which means I use less of it! I also love Sleek makeup. I look forward to making tutorials on YouTube and sharing how I achieve my looks." 

Seeing as I've never done this before, it's probably best to mention what exactly is involved. We decided on a Copper/Bronze and Green theme (with glitter) and challenged eachother to make a look with this theme. I was excited to find out what Sanna would use where, or if we'd end up with something similar, which we did in the end - great minds eh?
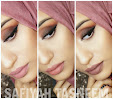
Here's the look I created with a full list of what was used:

Products used:
Eyes: 
> UDPP
> UD Smoked Palette - Kinky, Freestyle, Backdoor, Blackout, Loaded
> MAC Copper Sparkle pigment
> UD Perversion, Covet & Flipside 24/7 eye pencils
> NYC black liquid liner
> Daniel Sandler Jumbo Jet mascara 
> UD 24/7 concealer - ATF
> Khuraira ACC in Light   
Face: 
> Hourglass Veil Fluid - 4 Beige (sample)
> Ben Nye Banana powder
> Sleek Contour Kit - Medium (matte contour only)
> UD Flushed palette - highlighter only
Lips:
> MAC Mocha lipstick (Surf Baby collection)

After priming the eye as usual with UDPP, I used an angled liner brush to mark out the cut crease with UD Blackout eyeshadow. I then used a tapered blending brush to lightly add Blackout above the crease and blended upwards. I did the same with Backdoor, to intensify the smokiness. Kinky was then applied to the browbone, followed by Freestyle in between it and Blackout/Backdoor. I made sure to blend well and go back with either Blackout or Freestyle as needed above the crease.
I then used Loaded eyeshadow on the bottom lash line, followed by Covet & Flipside eye pencils on top, blended with a small angled brush into a point on the inner corner, and a split liner look on the outer corner. I then lined the eye with Perversion eye pencil and used NYC black liquid liner to finish lining the top eyelid, also creating a point on the inner corner. I filled in the gap between the outer corner lines with UD 24/7 concealer in ATF.
After concealing under the eye with Khuraira ACC, I coated the lashes with Daniel Sandler Jumbo Jet Mascara and filled in the brows with Backdoor and Blackout eyeshadows from the same Smoked palette.
trying to capture the sparkle!
For the rest of the face, I used a sample of the Hourglass Veil Fluid Makeup in 4- Beige all over the face and used Ben Nye Banana powder under the eyes and on areas needed. I then contoured with the Sleek Medium Contour Kit and highlighted from the UD Flushed palette.
On the lips I used MAC Mocha lipstick, mixed with a tiny bit of UD 24/7 concealer in ATF.
defocussing to try and capture sparkle again!

Here's Sanna's final look too:
 
I loved her use of green above the crease and pairing it with a nude lip, which looks awesome!
You can find out what products she used on her blog (Look A Million) and be sure to follow her on Instagram and Facebook too for more amazing looks.

I hope you liked this weeks edition of FOTD Frooti Fridays (FFF), if you'd like to see more of these, or would be interested in collaborating, please let me know!
 

FFF: Gold Maroon with Green-Blue makeup look

Friday 22 March 2013

This weeks FFF is one I decided to start off as an Asian Bridal look but then decided to veer off into a creative liner and added a pop of green-blue colour to it too.. hope you like it anyway!

Products used:
Eyes: 
> UDPP
> UD Smoked Palette - Freestyle, Backdoor, Blackout
> UD Vice palette - Blitz
> Sedona Lace 120 palette - Maroon shimmer shadow only
> MAC Woodwinked
> La Femme - matte white eyeshadow
> UD Perversion, Covet & Deviant 24/7 eye pencils
> NYC black liquid liner
> Daniel Sandler Jumbo Jet mascara
> Khuraira ACC in Light   
> Ardell 110 lashes
Face: 
> Illamasqua Skinbase in 10
> Ben Nye Banana powder
> UD Flushed palette - blush & highlighter only
Lips:
> Burberry lip liner - Rosewood 07
> Bourjois Sweet Kiss lipstick - Rose Folk (81)
 
After priming the eye with UDPP, I added Blitz (Vice Palette) to the inner corner and patted along the lid. For the outer corner of the eye I used MAC Woodwinked and with a blending brush used a bit of Backdoor and Blackout (Smoked Palette) in the crease, blending upwards. I then added the shimmery Maroon shadow from the Sedona Lace palette above the crease too, but very lightly, adding little by little. Freestyle (Smoked Palette) was used above this, blending using windscreen wiper motions, followed by the La Femme matte white shadow on the brow bone.
I then added Covet eye pencil to the bottom outer lashline, blending well with a small multitasker brush. Deviant pencil was added on top; I used a thin liner brush to sweep out a bottom flick from the bottom line, then used Perversion to line the whole inner eye.
NYC black liquid liner was used to line the top of the eye, then I added Khuraira concealer to the under eye area, followed by Daniel Sandler Jumbo Jet mascara to finish of the eyes.
Finally, the brows were filled in with Backdoor & a bit of Blackout shadows using an angled brush.
For the rest of the face I used my amazing new purchase - Illamasqua Skinbase in shade 10, followed by Ben Nye Banana powder under the eyes and any other areas needed. I then used Urban Decay's Flushed palette on the cheeks, using the blush on the apples of my cheeks, sweeping upwards and the highlighter at the top of my cheeks.
On the lips I used a great nude colour all over the lips (Burberry Rosewood 07) then applied Bourjois Rose Folk 81 lipstick on top:

I added some lashes to the eyes coz I thought they could do with some oomph, so I used my trusty Ardell 110 lashes:

I hope you liked this look as much as I enjoyed creating it, feel free to let me know if you have any particular requests too!


Sunday Skincare: Bioderma UK launch & mini reviews

Sunday 17 March 2013

Last Tuesday I attended the launch of Bioderma in the UK (well London for now!).
If you haven't heard about Bioderma yet.. Where have you been?!
The Crealine H2O Micellar
Solution (or water with oil solution) has been something of a cult product in the beauty world, with one bottle being sold every 6 seconds and it has the status of "best makeup remover". In the UK it's named Sensibio instead of Crealine but its essentially the same product.

I've always wondered what the hype was with this product but never got round to trying it, so when I got the invite for the UK launch I was overly excited to finally learn (and try) this cult product.
I attended the launch with blogger friends MangoWhirl, Tanzina and Asmaa, and we learned that the French brand Bioderma stems from Biology + Dermatology. Coming from a biological/science background (well nutrition, physiology and the like in my degree!), I'm always a fan of products that actually take into account that whole side, as things such as hormones, diet etc affect the skin. Dermatology is also important and great for when your skin is going through some changes so the fusion of the two in this brand is excellent in my opinion.

We also learned that there's actually a lot more to the Bioderma brand other than their H2O Micellar Solutions (shock horror!). They will be releasing 5 skincare ranges in the UK, and these pretty much cover the most common skin concerns/types:

1) Sensibio - for sensitive skin
2) Sebium - for oily/acne prone skin
3) Hydrabio - for dehydrated skin
4) Atoderm - for dry and atopic/eczema prone skin
5) Photoderm - for skin in need of advanced sun protection (well that's everyone in my opinion!)

One thing that stood out to me was that the Photoderm range covers protection for all skin types too, within it's sun protection range; so sun protection for acne, rosacia or damaged skin too, which isn't usually found in suncare ranges.  

Bioderma will be sold in leading pharmacies like John Bell & Croyden and Bliss Pharmacy. Now a lot of people may be disappointed that it won't be in places like Boots or Superdrug but after speaking to the ladies from Bioderma, they said that they'd rather have their products sold correctly by consultants first rather than people picking up the wrong products for their skin. 
I'm happy with this reason personally; I'm more prone to buying makeup and particularly skincare from department stores as I like the correct consultation and don't like standing at Boots' small displays reading everything on the packaging and then proceeding to try out the product on the hand, as my face usually has makeup/my hands are unsanitary; the list could go on! 
When a product has a cult status however, I do like to read up on it online and then buy it from Boots etc, but generally I don't like loitering around by myself at the displays, swatching a million products without a tissue at hand like you would on a counter!


Anyway, I found the Sensibio H2O Micellar Solution to be great at removing my makeup, particularly eye makeup. In one swipe it was gone and felt like I was removing it with water, despite always wearing primer. I struggled slightly with my waterproof eyeliner on a cotton pad but just removed it with my cotton buds on the inner eye; amazing!

I've also tried the Sebium Pore Refiner on two clients already who have oily/acne-prone skin and found it to mattify it amazingly, whilst also minimising the pores. I'm sure it made the skin softer to apply the foundation onto too.
Sebium Micellar Solution & Pore Refiner
The Sensibio H2O Micellar Solution is priced at £9.99 for 250ml and the full range is available at leading pharmacies such as John Bell & Croyden (behind Debenhams in Oxford Street, London), Bliss Pharmacy Gloucester Road, Beauty Mart at Harvey Nichols or online at Escentual.com.

Have you tried Bioderma before? Which would you recommend?


FFF: Smokey Green makeup look, YT tutorial + 3 contour techniques too!

Saturday 16 March 2013

Hello my lovely Frooti's and Frootettes!

I've finally managed to follow up with another video tutorial after my last debut in November-December (shocking, I know!). Not only that but I included 3 ways to contour, but did them all in one go for extra emphasis in this look.

I posted this look a couple weeks back on Instagram from my phone (I couldn't wait, obviously), so I've finally managed to edit the video and write up a blog post to go with it; go me!

Hope you enjoy this tutorial, thanks for the feedback from the last video, I've taken on board the comments and tried to make it better.

Products used:
Eyes: 
> UDPP
> Naked 2 palette - Blackout, Tease, Foxy
> Vice palette - Junkie
> UD Perversion & Junkie 24/7 eye pencils
> NYC black liquid liner
> Daniel Sandler Jumbo Jet mascara
> Khuraira ACC in Light  
> ELF black cream eyeliner
Face: 
> UD 24/7 concealer pencil in ATF
> UD Naked Skin in 7.0
> Illamasqua Blush Duo - Lover & Hussy (Lover only used)
> Sleek Contour Kit in Medium (matte brown shade & highlight only)
Lips:
> UD Naked lip liner
> Illamasqua Immodest lipstick

After priming the eye with UDPP, I added Blackout (Naked 2) to the whole lid with the brush included in the UD Vice palette (flat shadow brush), extending it slightly beyond the outer corner of the eye. Using the fluffier crease brush on the other side of the brush, I blended back and forth to soften the harsh lines.
Foxy was added to the brow bone with a blending brush and blended slightly down. I then added Tease with a Sigma E45 tapered blending brush to the crease and blended between Blackout and Foxy.
I then added Blackout with a shorter buffing brush by Crownbrush to the bottom lash line and lined the inner eye with UD Perversion eye pencil. You can add more black to the lid if you've blended too much at this point. Add Junkie eyeshadow to the lids only with a flat eye shadow brush, then add Junkie eye pencil to the lower lashline too.
Clean up under the eye with a makeup wipe, then add NYC black liquid liner to the top lash line. Curl the lashes and add Daniel Sandler Jumbo Jet Mascara.
Conceal under the eyes with Khuraira ACC in Light, then blend upwards cleaning up the eyeshadow line with the Real Techniques Pointed Foundation brush.
Fill in the brows with an angled brush and ELF cream eyeliner in black.
For the rest of the face I then concealed with the UD ATF 24/7 concealer stick where needed, and used 3 different contour methods:
1) Add foundation 3-4 shades darker to the hollows of the cheeks. I used Graftobian HD Creme foundation in Midnight Marigold for my contours with the Real Techniques Pointed Foundation brush.
I then added Naked Skin foundation to the face with the UD Optical Blurring brush, but stippling/patting only around the contour area.
2) I then contoured lightly with the Real Techniques Contour brush and with Sleek's Face Form in Medium, using only the matte shade in the hollows of my cheeks again.
3) Another contour method which I have now adopted into my daily routine is simply using the Illamasqua Blush Up brush (review here). I stippled on the matte colour in the Face Form to the area needed and blended upwards with the brush and also with the RT Contour brush to blend even more.

I then added Illamasqua Lover blush to my cheeks with the UD blush brush and highlighted the top of my cheeks with the Face Form highlighter.
Finally I lined and filled the lips with UD Naked lip liner and added Illamasqua Immodest on top.
The YouTube video can be found here and I've added it below too; let me know your thoughts/recommendations as ever, I'm still new to the whole video thing and get mildly stressed out by the whole editing process! I'd love to make them more frequently but to be honest I find blogging easier.


If you do recreate this look, I'd love to see it so please feel free to leave a comment below with your link or you can tweet me =)


Kiko Colours In The World Spring '13 swatches and review

Monday 11 March 2013

Hello my lovelies!

I thought I'd do a quick post on some of the new Kiko Milano cosmetics Spring 13 collection.

Kiko is an Italian brand that can be found in both Westfields in London and is another one of my favourite brands, but one that is priced in between a drugstore brand and higher end brands.

The Colours in the World collection encompasses a selection of face, eyes, lips and nail products as well as brushes and is limited edition. If you saw my post on the Light Impulse palette, you'll know they do great limited edition products, but here are my thoughts on the Colours in the World collection.
Long Lasting Lipstick - 05
The Long Lasting Lipstick in 05 is named "Red Orchid" and is available in 6 shades.
Colour & Pigmentation: 05 Red Orchid is a beautiful deep burgundy sort of colour; like Viva Glam 1 but with more of a raspberry note. Pigmentation is great!
Texture: This lippy goes on smooth and creamy and feels very comfortable to wear, then dries to a matte finish.
Longevity: As it dries to a matte finish, it's pretty long lasting and remains after drinking!
Scent: Smells just like MAC lipsticks - vanilla yum!
Packaging: Metallic looking, long twist up stick. Looks sleek until you get fingerprints on it.
Price: At £6.90 it's just slightly higher priced than a drugstore brand but less than a more high end brand. 

FrootiFactor: For me, this lipstick ticks all the right boxes; I love how although it has a matte finish, it doesn't go on dry at all and the colour looks quite gorgeous too. I'd give it a 4.5 out of 5
Vivid Eyes Kajal & Eyeliner - 04
The Vivid Eyes Kajal & Eyeliner consist of one black "kajal" end and one coloured pencil end, perfect for highlighting or adding a pop of colour to the eye other than black. I have 04 - "Green Apple/Black" which is a sort of Teal shade with shimmer. Available in 4 shades.
Colour & Pigmentation: The black in the duo is fairly pigmented and the Green Apple shade is slightly less but still enough to get a good amount of colour on the eyes.
Texture: Not as creamy/smooth as other liners I'm used to.
Longevity: The black shade lasts longer than the teal shade, but the packaging doesn't actually state "long lasting" or "waterproof" so I'd imagine these are not the best to cry in!
Price: £7.90 each.

FrootiFactor: All in all, I'd give the Vivid Eyes Kajal eyeliner a 2 out of 5 max; simply because I prefer softer textures and definitely waterproof ones!
Pigment Loose Eyeshadow - 29
The Pigment Loose Eyeshadow is a highly pigmented loose eyeshadow in a fairly generous pot of 6g (MAC pigment is 4.5g). 29 is named "Breezy Azure".
Colour & Pigmentation: 29 Breezy Azure is a bright, vivid blue colour and is fairly pigmented.
Texture: The texture is fairly smooth but a bit grainy; it would work better with a mixing medium/solution or primer rather than bare skin.
Packaging: The pigment comes with a plastic plug that stops the shadow from spilling but no filter or sifting type of dispenser, just an open jar which can be messy!
Price: At £5.90 it's just a little more than a drugstore brand but again not half as much as a higher end brand, so still worth it, particularly for the weight.

FrootiFactor: I'd give the pigment a 3.5 out of 5 purely because I'm more of a pressed powder eyeshadow fan for most shadows (unless glittery pigments), but also because I feel it wasn't as pigmented/soft as I'd like.
Celebration Nail Lacquer - 422
I've tried Kiko polishes before and have been impressed with the creaminess of the polish. This shade (422- Mint Green) is gorgeous for Spring and as I only have one other mint green colour by Barry M but the consistency is very thin.
Colour & Consistency: This 422 Mint Green polish is slightly thinner than my other mustard coloured Kiko polish, however still creamier than my mint Barry M one; 2 coats needed max for full effect.
Longevity: The polish lasts a few days (3-5) and I like that it dries fast and has nail strenghening/hardening properties.
Price: Priced at £4.90 each, they are reasonably priced for the quality you're getting (not to mention the selection of usual shades!)


FrootiFactor: I'd give this polish a 4 out of 5, simply because it's a great colour for Spring and is still quite creamy and has great nail strengthening properties:
 
All in all, I personally will be looking at more of the Long Lasting Lipsticks as I love how it actually does last but feels non-drying on the lips and maybe a few of the polishes too as they have so many shades!

Have you checked out Kiko cosmetics before? Will you be buying anything from the new Colours in the World range?


FFF: Theodora vs Glinda

Friday 8 March 2013

In light of the new Oz The Great and Powerful movie being released today, I thought I'd do a double makeup look post - Theodora vs Glinda palettes. They're just simple easy looks using only the eyeshadows from the palettes, nothing fancy but I hope you like!

Theodora look

Products used:
Eyes: 
> UDPP
> UD Theodora palette - all shadows except the gold in "Spell" (description of shadows here)
> UD Zero 24/7 eye pencil
> Daniel Sandler Jumbo Jet mascara
> Khuraira ACC in Light 
Face: 
> UD Naked Skin in 7.0
> UD Toasted Baked bronzer
> Sleek Contour Kit in Medium (matte brown shade only)
Lips:
> UD SSLC in "Theodora" (F-Bomb)

After applying UDPP, I followed the instructions on the instruction card included with the palette;
Broken was applied on the brow bone, followed by Bewitch in the crease and Beware blended in between the brow bone and crease. I also added a tiny bit of the black shadow in the Spell duo shadow to the crease for extra definition. West was used on the eyelid and then a bit of the light shade Broken on the middle of the lid. I then used Jealous duo shadow for the bottom lash line and Zero eye pencil to line the whole inner eye as well as top liner. I used the Daniel Sandler Jumbo Jet mascara and Khuraira concealer to finish off the eye.
For the rest of the face, I used Naked Skin foundation in 7.0 all over, with a bit of Toasted bronzer on the cheeks, and the matte brown of the Sleek contour kit in Medium in the hollows of the cheeks. For the lips I used the SSLC in Theodora:

Glinda look

Products used:
Eyes: 
> UDPP
> UD Glinda Palette - all shadows except Magic (description of shadows here)
> UD Rockstar 24/7 eye pencil
> Daniel Sandler Jumbo Jet mascara
> Khuraira ACC in Light 
Face: 
> UD Naked Skin in 7.0
> UD Flushed palette
Lips:
> UD SSLC in "Glinda" (Naked)

I initially followed the instruction card included with the Glinda palette but it looked a hot mess so I decided to do a different version that didn't include the pink shade Magic.
After applying UDPP, I applied the silver shadow of the Oz duo on the inner corner, then the gold from Oz on the middle of the lid, followed by South on the outer corner of the eye. Tornado was added to the crease of the eye and blended upwards, followed by the pink iridescent shade of the Aura duo on the browbone. I used a tiny bit of Illusion in between the brow bone colour and the crease, and rimmed the eye with Rockstar but not on the inner eye.
To finish the eyes I applied under eye concealer and mascara.
For the rest of the face I used the Naked Skin foundation in 7.0 followed by the Flushed palette as Glindas cheeks look highlighted. I used the "Glinda" SSLC on the lips:

If you read my review of the Theodora palette (here), you'll know I gave it a rating of 4/5; after receiving the Glinda palette, I have to say it gets a lower rating of 3-3.5 as the colours do not look the greatest on my skintone, however I do think on fairer skintones it would look quite stunning. My favourite shadows from the Glinda palette have to be the Oz duo and South but Illusion was a tad too chalky for me to use more heavily unfortunately. All in all I enjoyed playing with both palettes and love how great value for money they are!

Which makeup look did you like best? Will you be buying any of the palettes before they're sold out?


FFF: Illamasqua Speckled Eyeliner makeup look

Friday 1 March 2013

FFF is finally back after a little break.. and I thought I'd follow on from the last post with a speckled eyeliner look.
After the Illamasqua ImPerfection launch (read about it here), I felt so inspired after seeing Alex Box demonstrate the speckled eyeliner technique. I decided to do my own version as in the visual from the campaign (at the bottom of this post), but with normal black eyeliner and gold. 
I posted a preview on my Instagram (above) but here is the full look with the rest of the ImPerfection products:

Products used
Eyes:

> UDPP- Greed (yellow gold)
> UD Naked 2 - Bootycall, Tease & Blackout (eyebrows)
> NYC black liquid liner 
> UD 24/7 liquid eyeliner in El Dorado
> Rimmel Scandaleyes waterproof kohl kajal in 005 "Nude"
> Daniel Sandler Jumbo Jet mascara
> Khuraira ACC in Light 
Face: 
> Graftobian HD foundation - Desert Sand
> Illamasqua Blush Duo in Hussy & Lover
Lips:
> Illamasqua Immodest lipstick

After applying UDPP in Greed all over the eyelid, I used the NYC black liquid liner to create a simple fairly thin winged liner, then speckled with the same black liner along the wing. I then went in with the UD gold liquid liner (El Dorado) which is slightly glittery and did the same speckled effect on the eyeliner wing and followed it on to the main liner on the rest of the lid. Using a crease brush I then slightly contoured the eyelid using Tease in the crease and Bootycall on the brow bone. Blackout was used to fill the eyebrows with a angled brush. I lined the bottom inner waterline with the Rimmel Scandaleyes eyeliner in Nude and finished off the eye with the Daniel Sandler Jumbo Jet mascara on top and bottom lashes and concealed under the eyes with Khuraira ACC in Light.
I used the Graftobian HD creme foundation lightly all over the face then using the blush up brush, lightly added both Hussy and Lover blushes, using Lover more than Hussy.
For the lips I used the new Illamasqua Immodest liptick:

I think the speckled eyeliner effect is really wearable when worn subtly like this, particularly if you dress it down with a nude liner on the waterline; I love how easy it is too!

Here's the original ImPerfection campaign visual that inspired me:
The flash on my camera washed out my blush unfortunately (it was a bit more prominent like in the promo image!), but I loved doing this look nevertheless. 

Would you wear this speckled look? What colour combinations would you try?


template design by Studio Mommy (© copyright 2015)